Create and manage groups
Before we get into more advanced aspects of Secure Access with EntraID you should be comfortable with the basics, if you have prior experience with on premises Active Directory Administrative Center (ADAC) this should be quite intuitive.
Task 1: Create a basic group and add members
1. Sign in to the Azure portal with your login credentials.
2. Navigate to the Azure Active Directory.
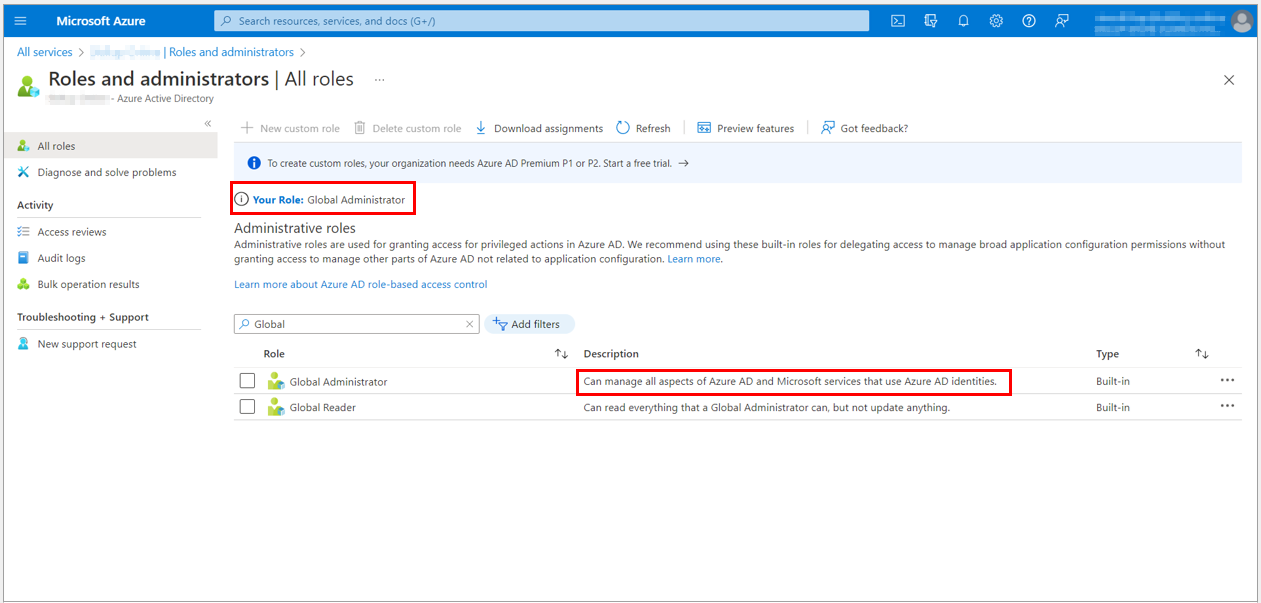
3. Select the Roles and administrators under the Manage blade to check your role.
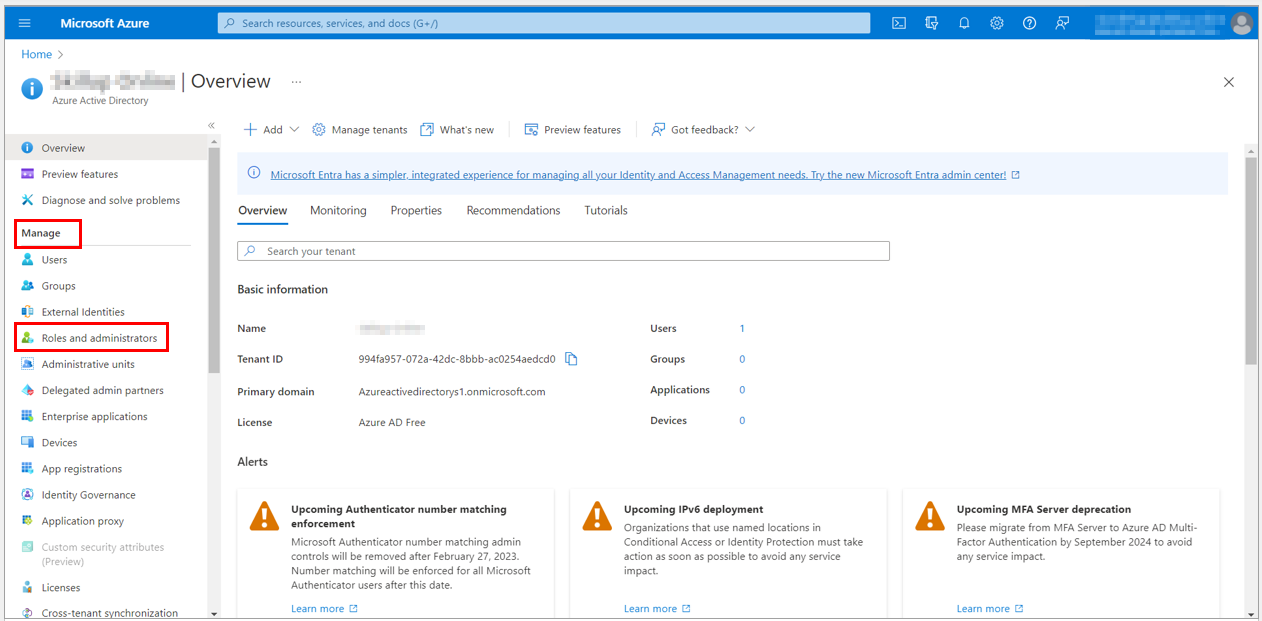
4. To create a user, check your role. If your role is listed as Global Administrator, you can manage all aspects of Azure AD.
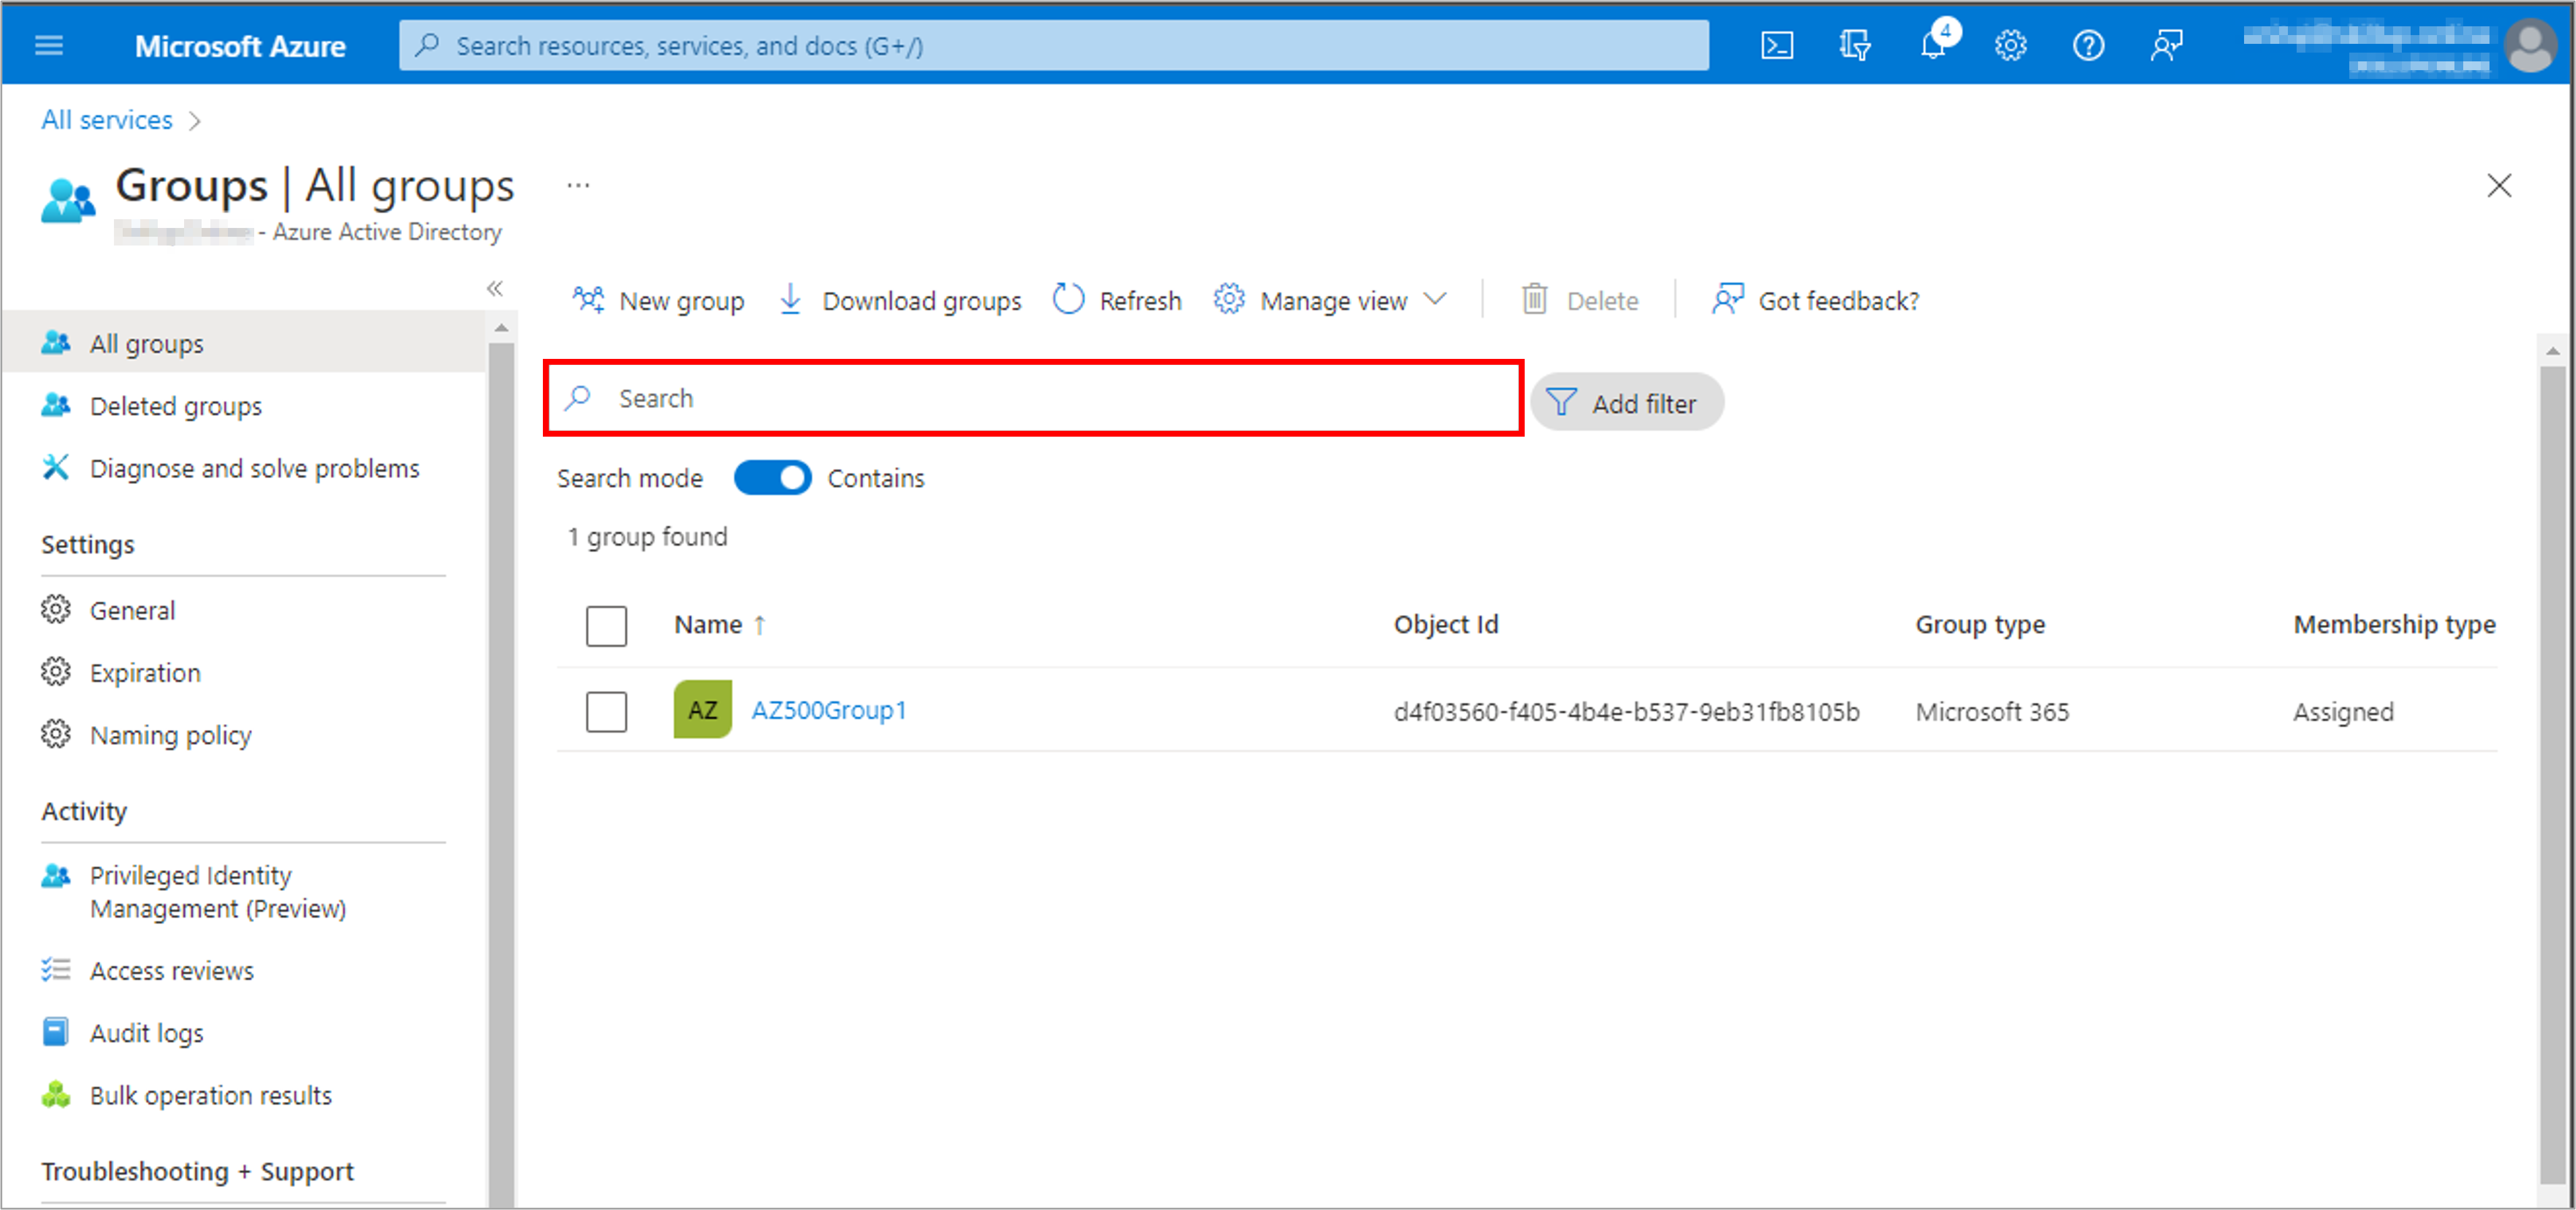
5. Navigate back to your Azure Active Directory. Under the Manage blade, select Groups.

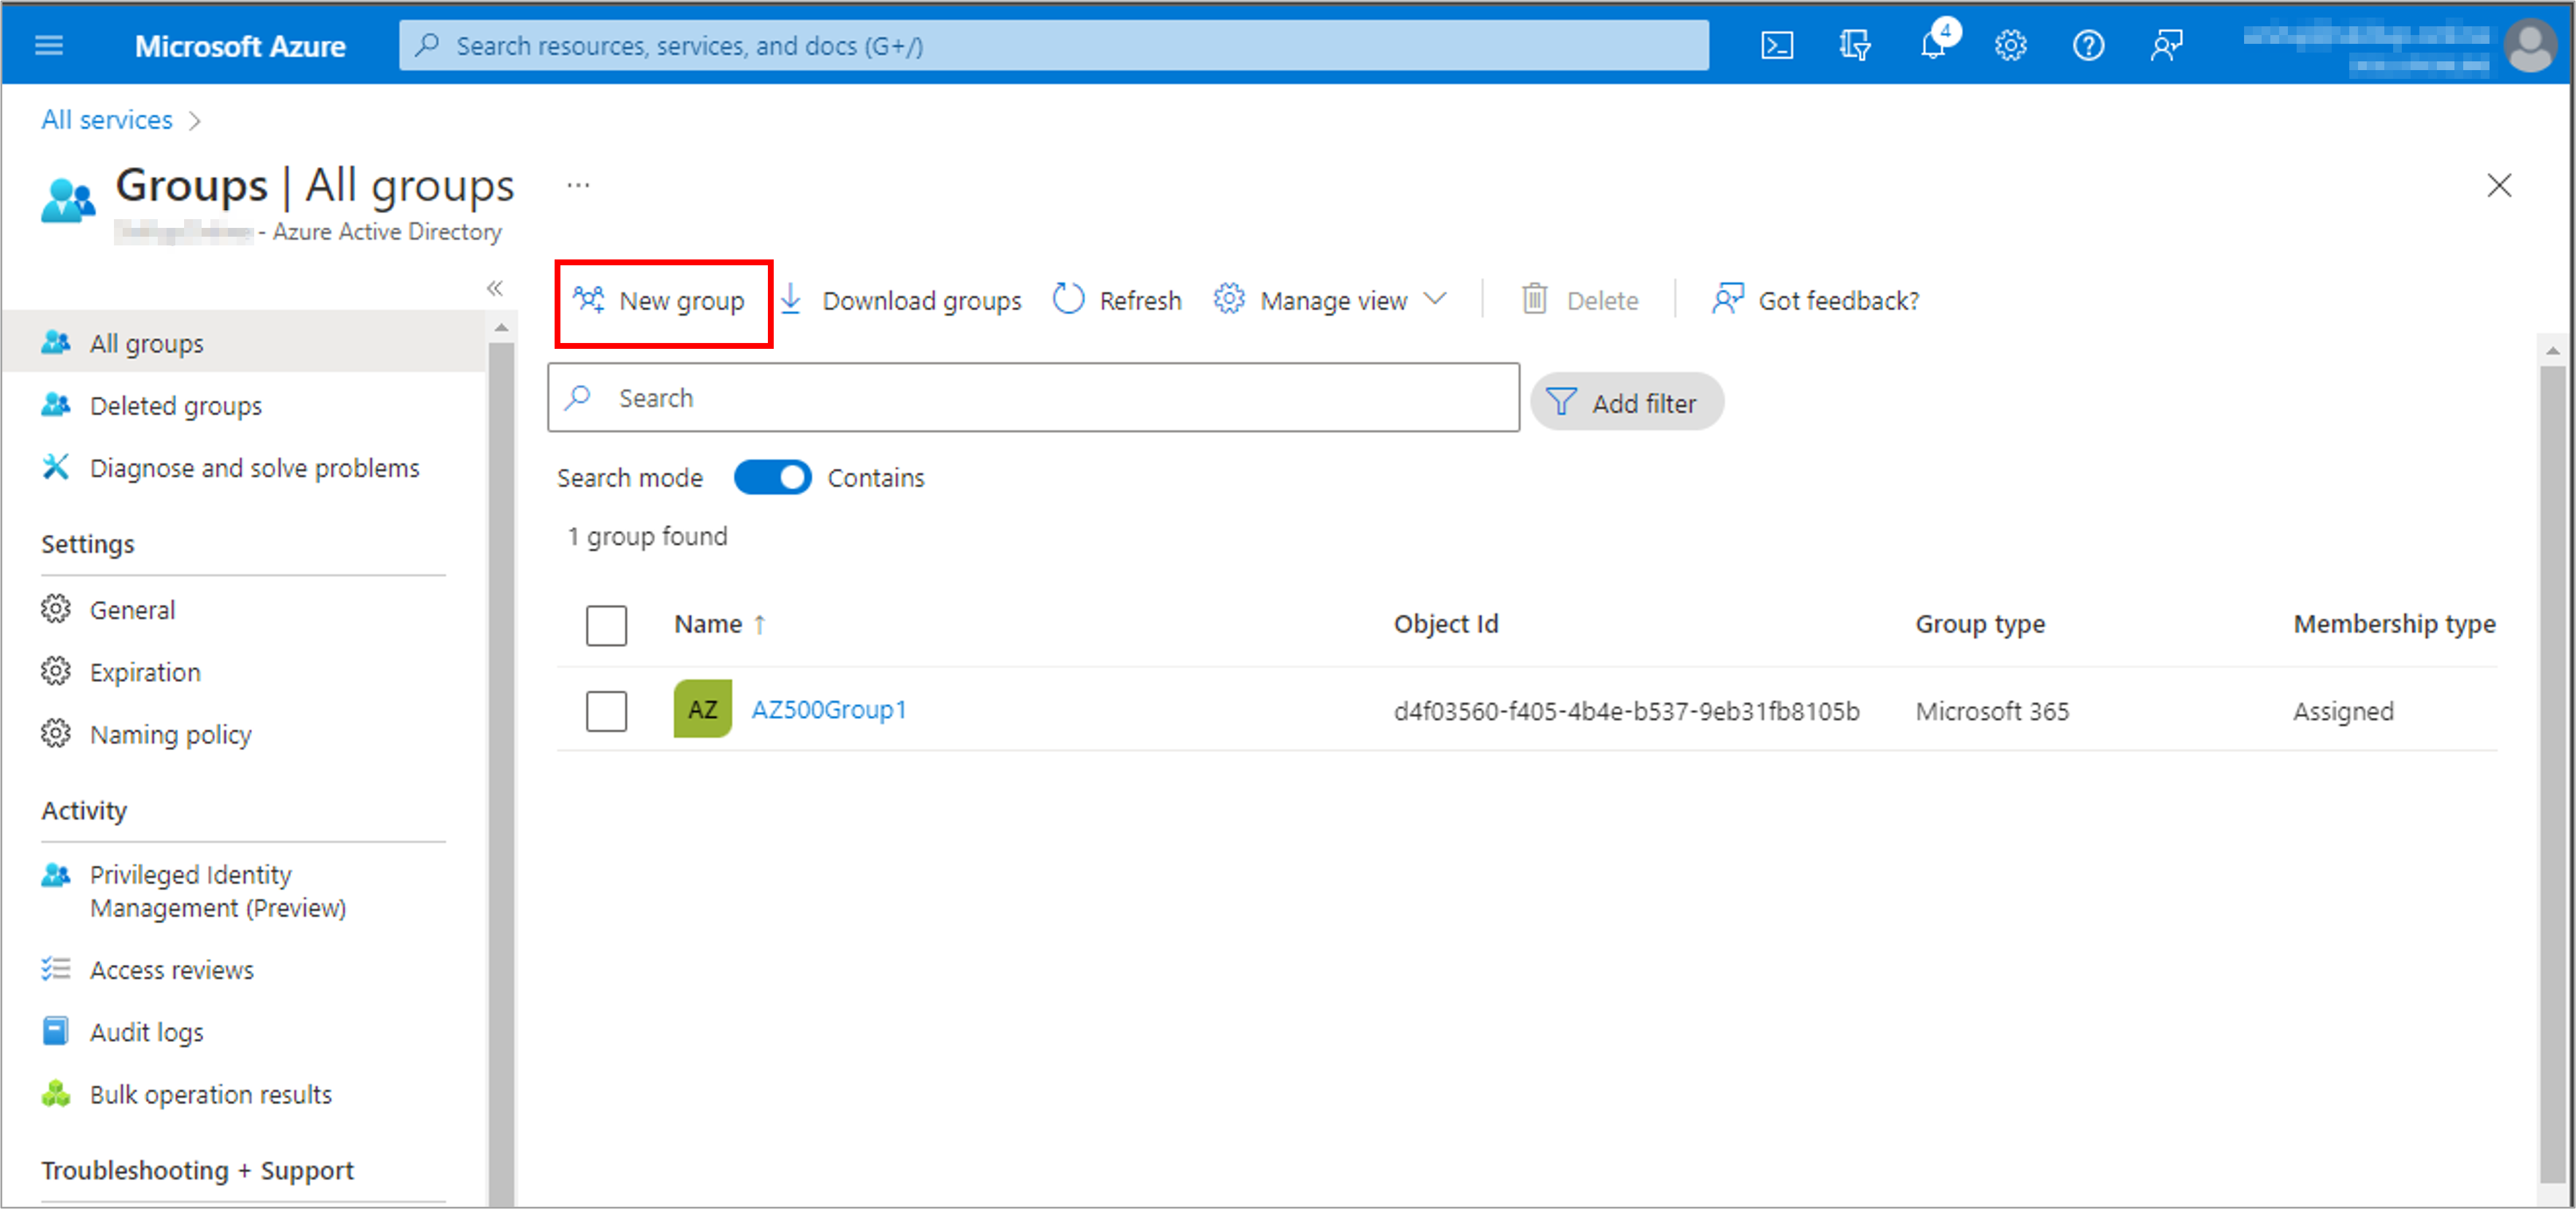
6. Select New group from the menu to create a new group.

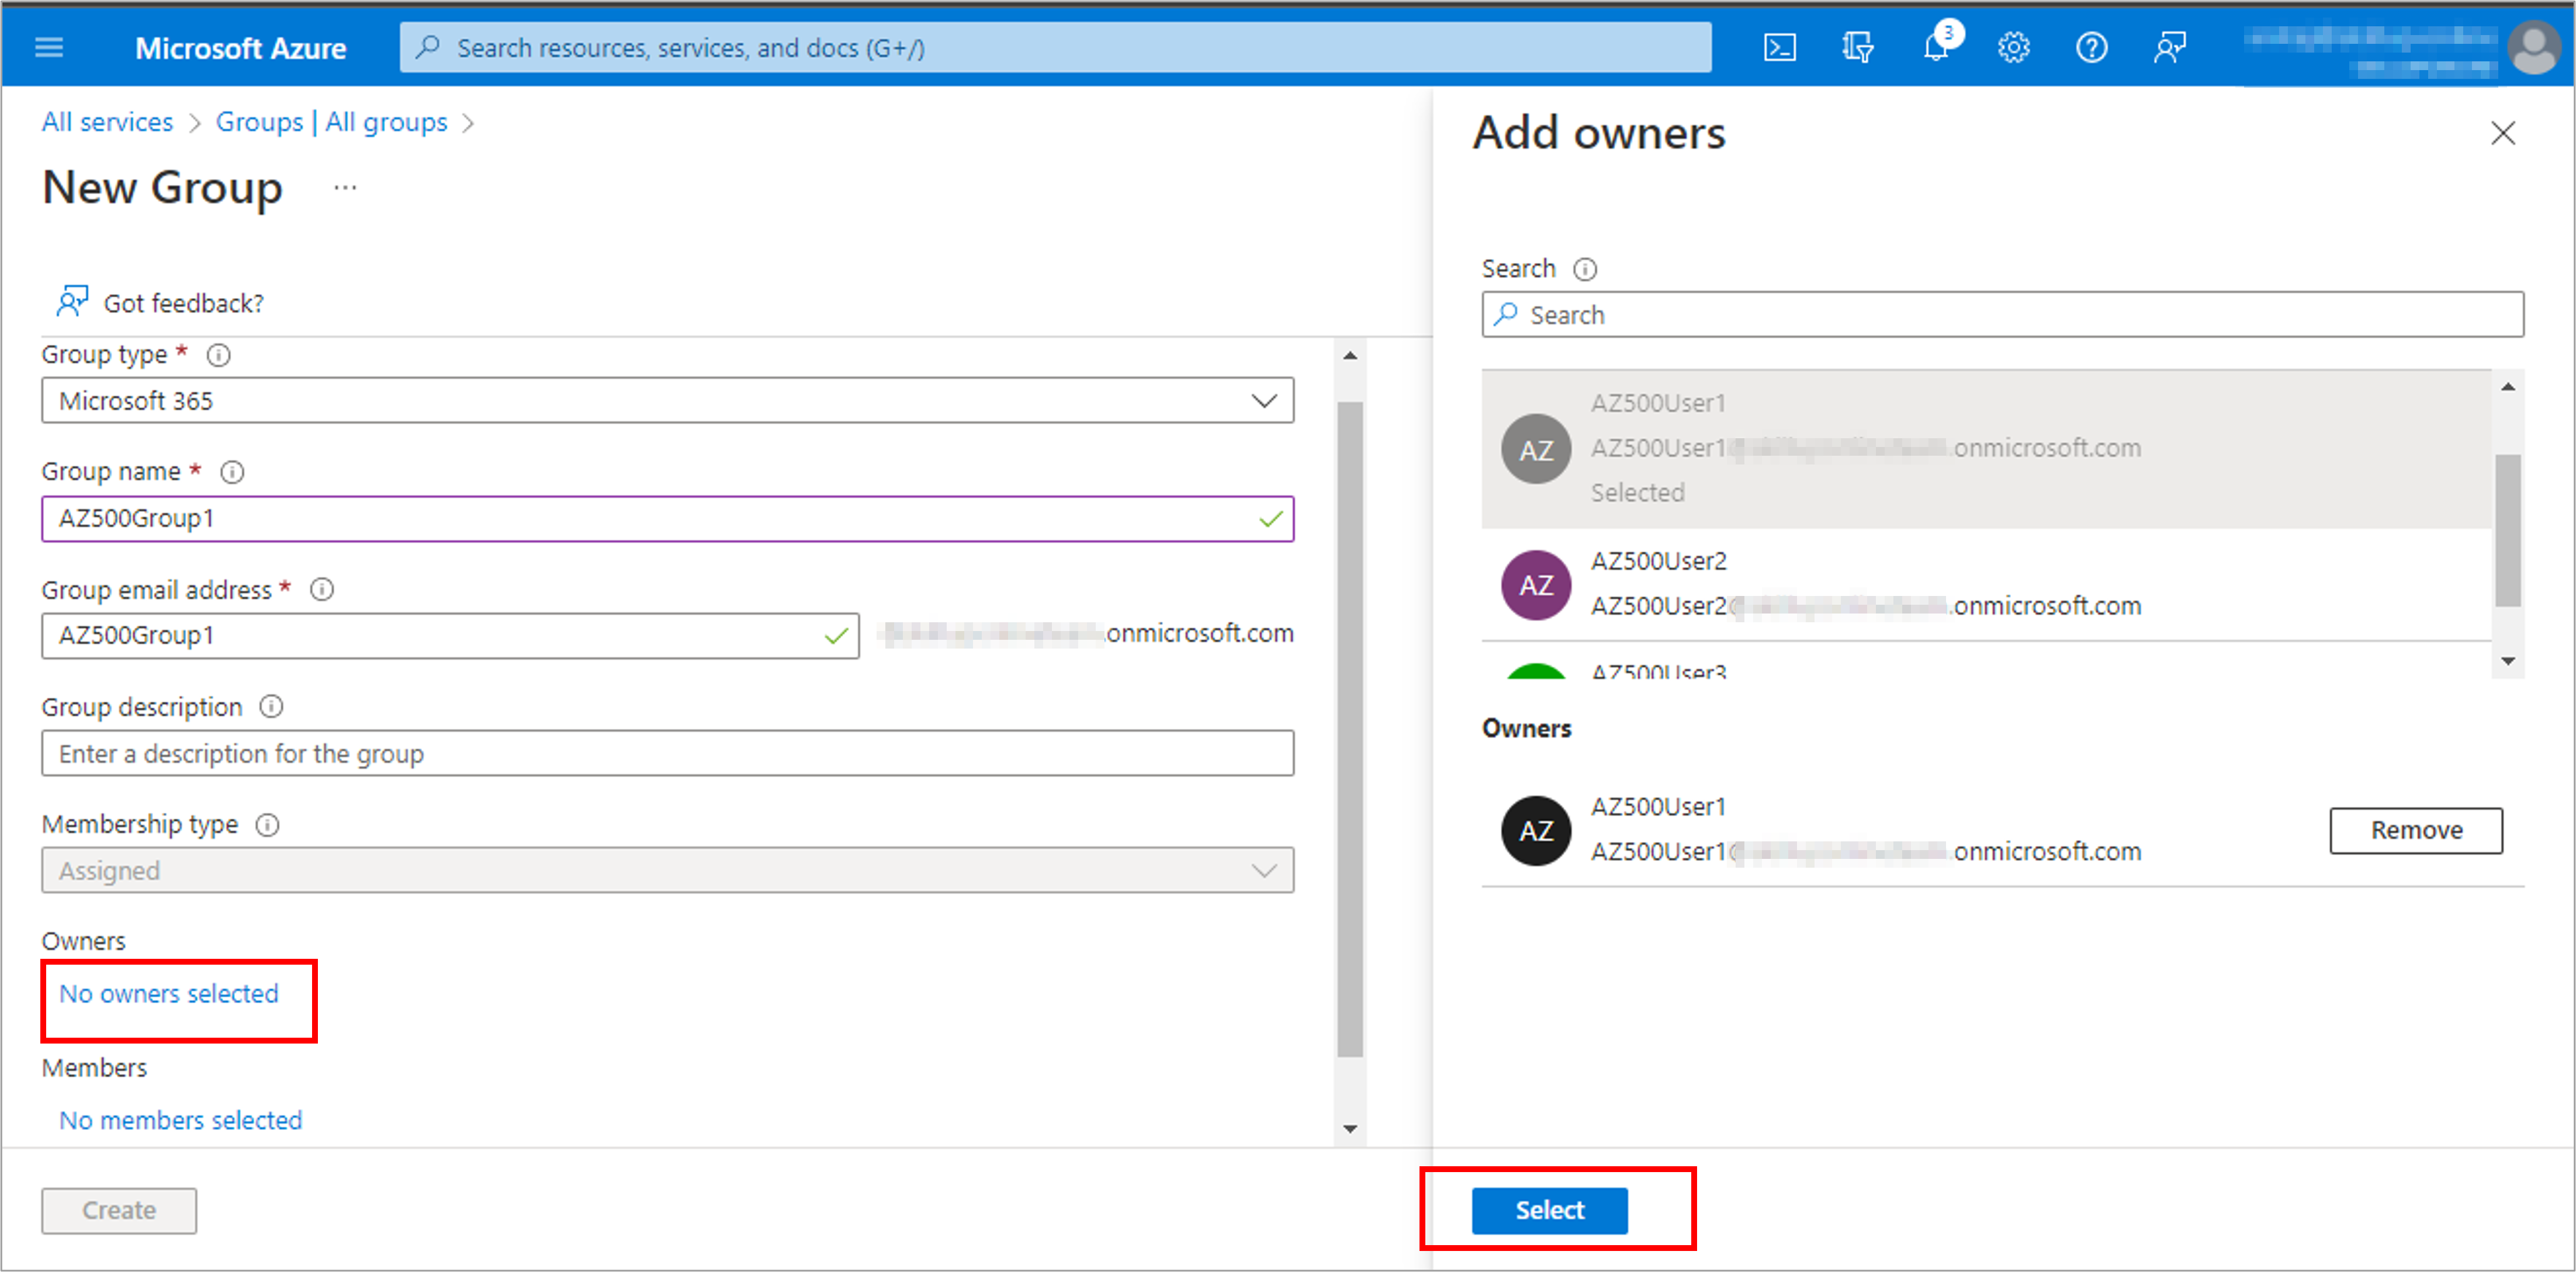
7. On the New Group page, provide the new group’s information.
8. Select the Group type as Microsoft 365. Selecting the Microsoft 365 group type enables the Group email address option.
9. Provide a Group name. A check will be performed to determine if the name is already in use. If the name is already in use, you will be asked to change the name of your group.
10. Enter a Group email address, available only for Microsoft 365 group types. Enter an email address manually or use the email address built from the Group name you provided.
11. Select the Membership type as Assigned.
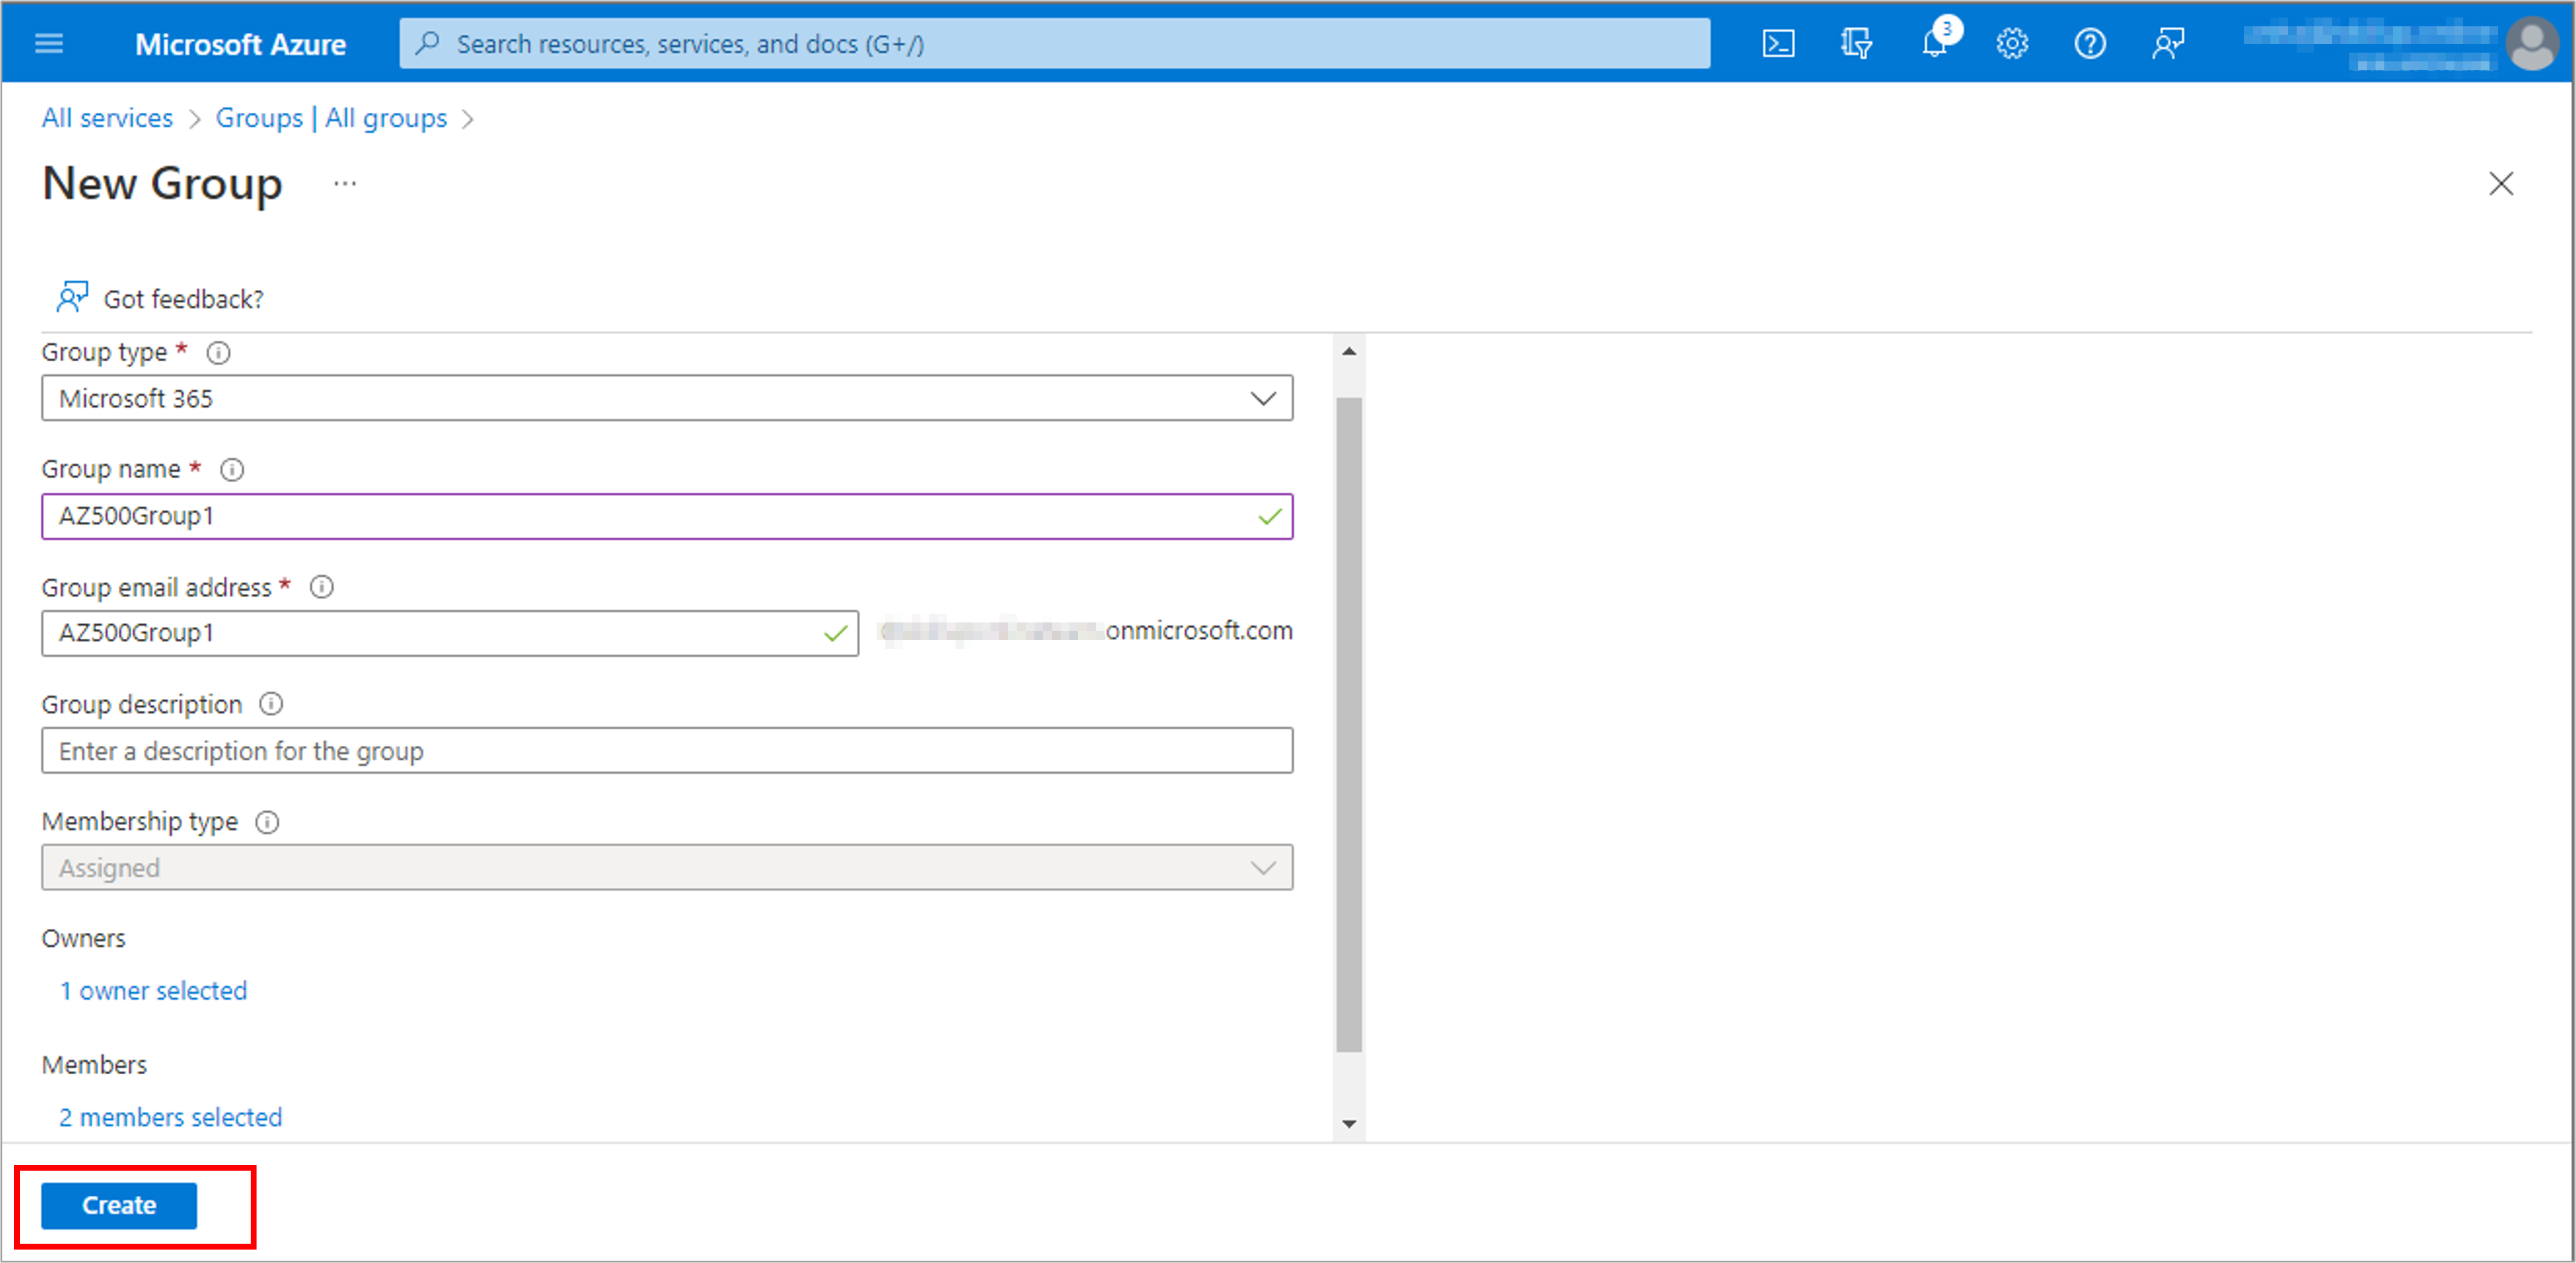
12. Add owners to your group by selecting the link under the Owners. Choose users from the populated list (on the right-hand side) and select the Select button to add them as owners.
13. Add members to your group by selecting the link under the Members. Choose users from the populated list(on the right-hand side)and select the Select button to add them as members.

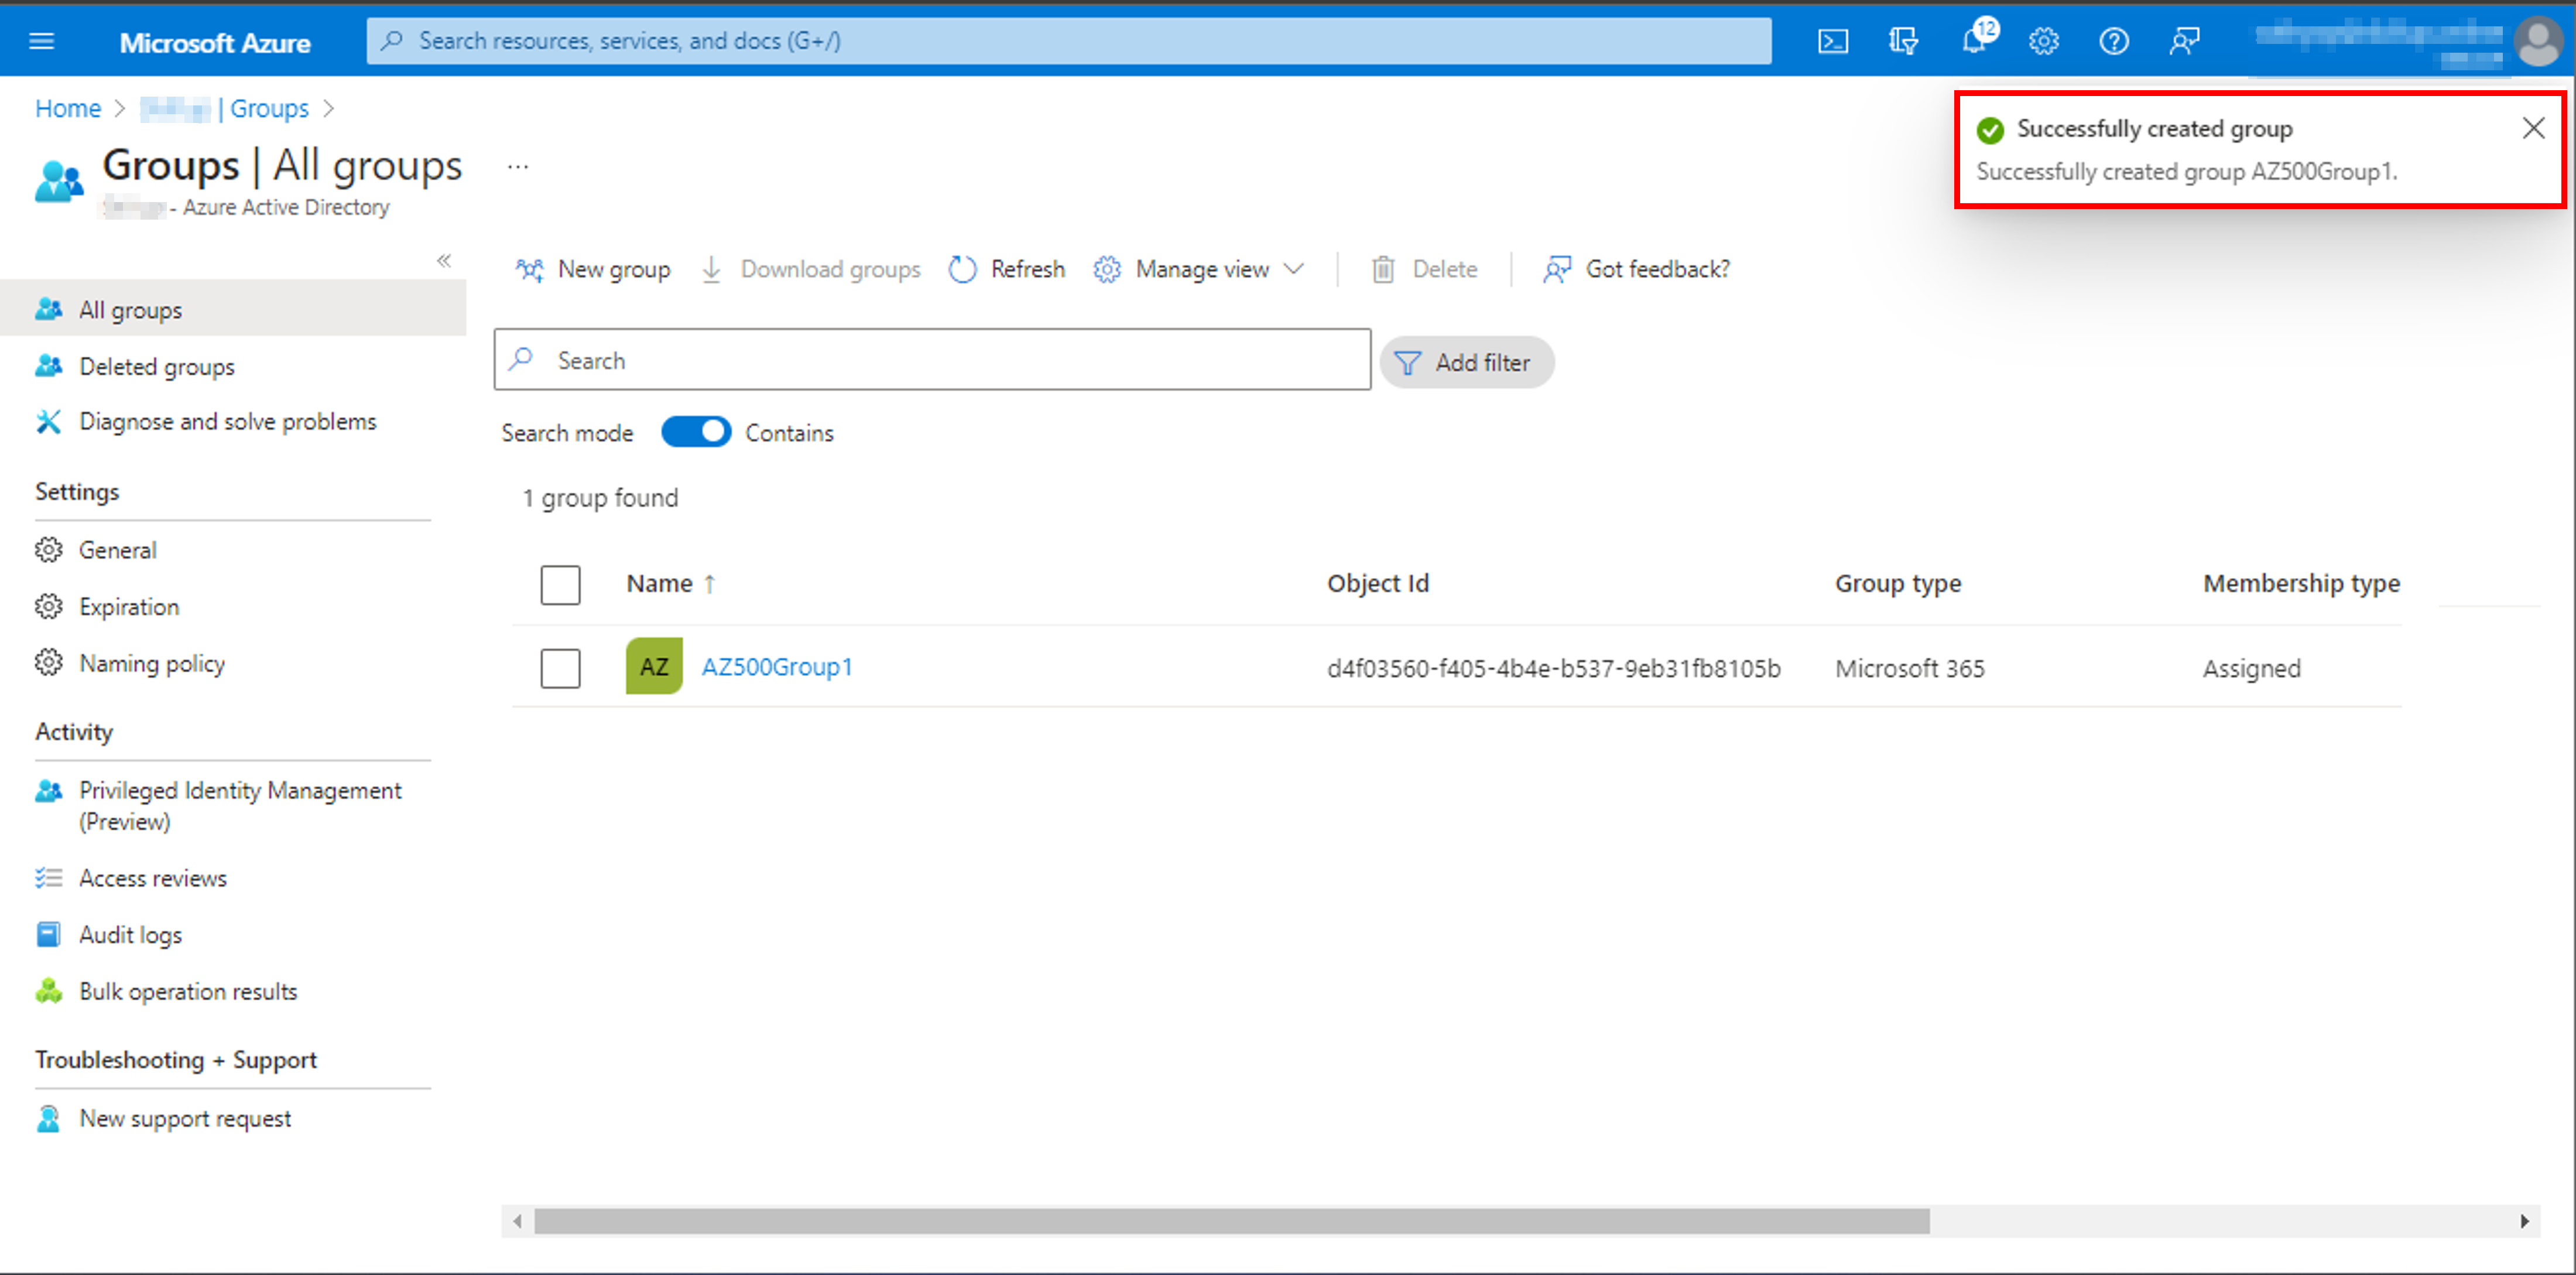
14. Select the Create button to create the group.
Your group is successfully created and ready for you to manage other settings.
Task 2: Add and remove members and owners
1. Under the Manage blade select Groups. Select the group you need to manage.
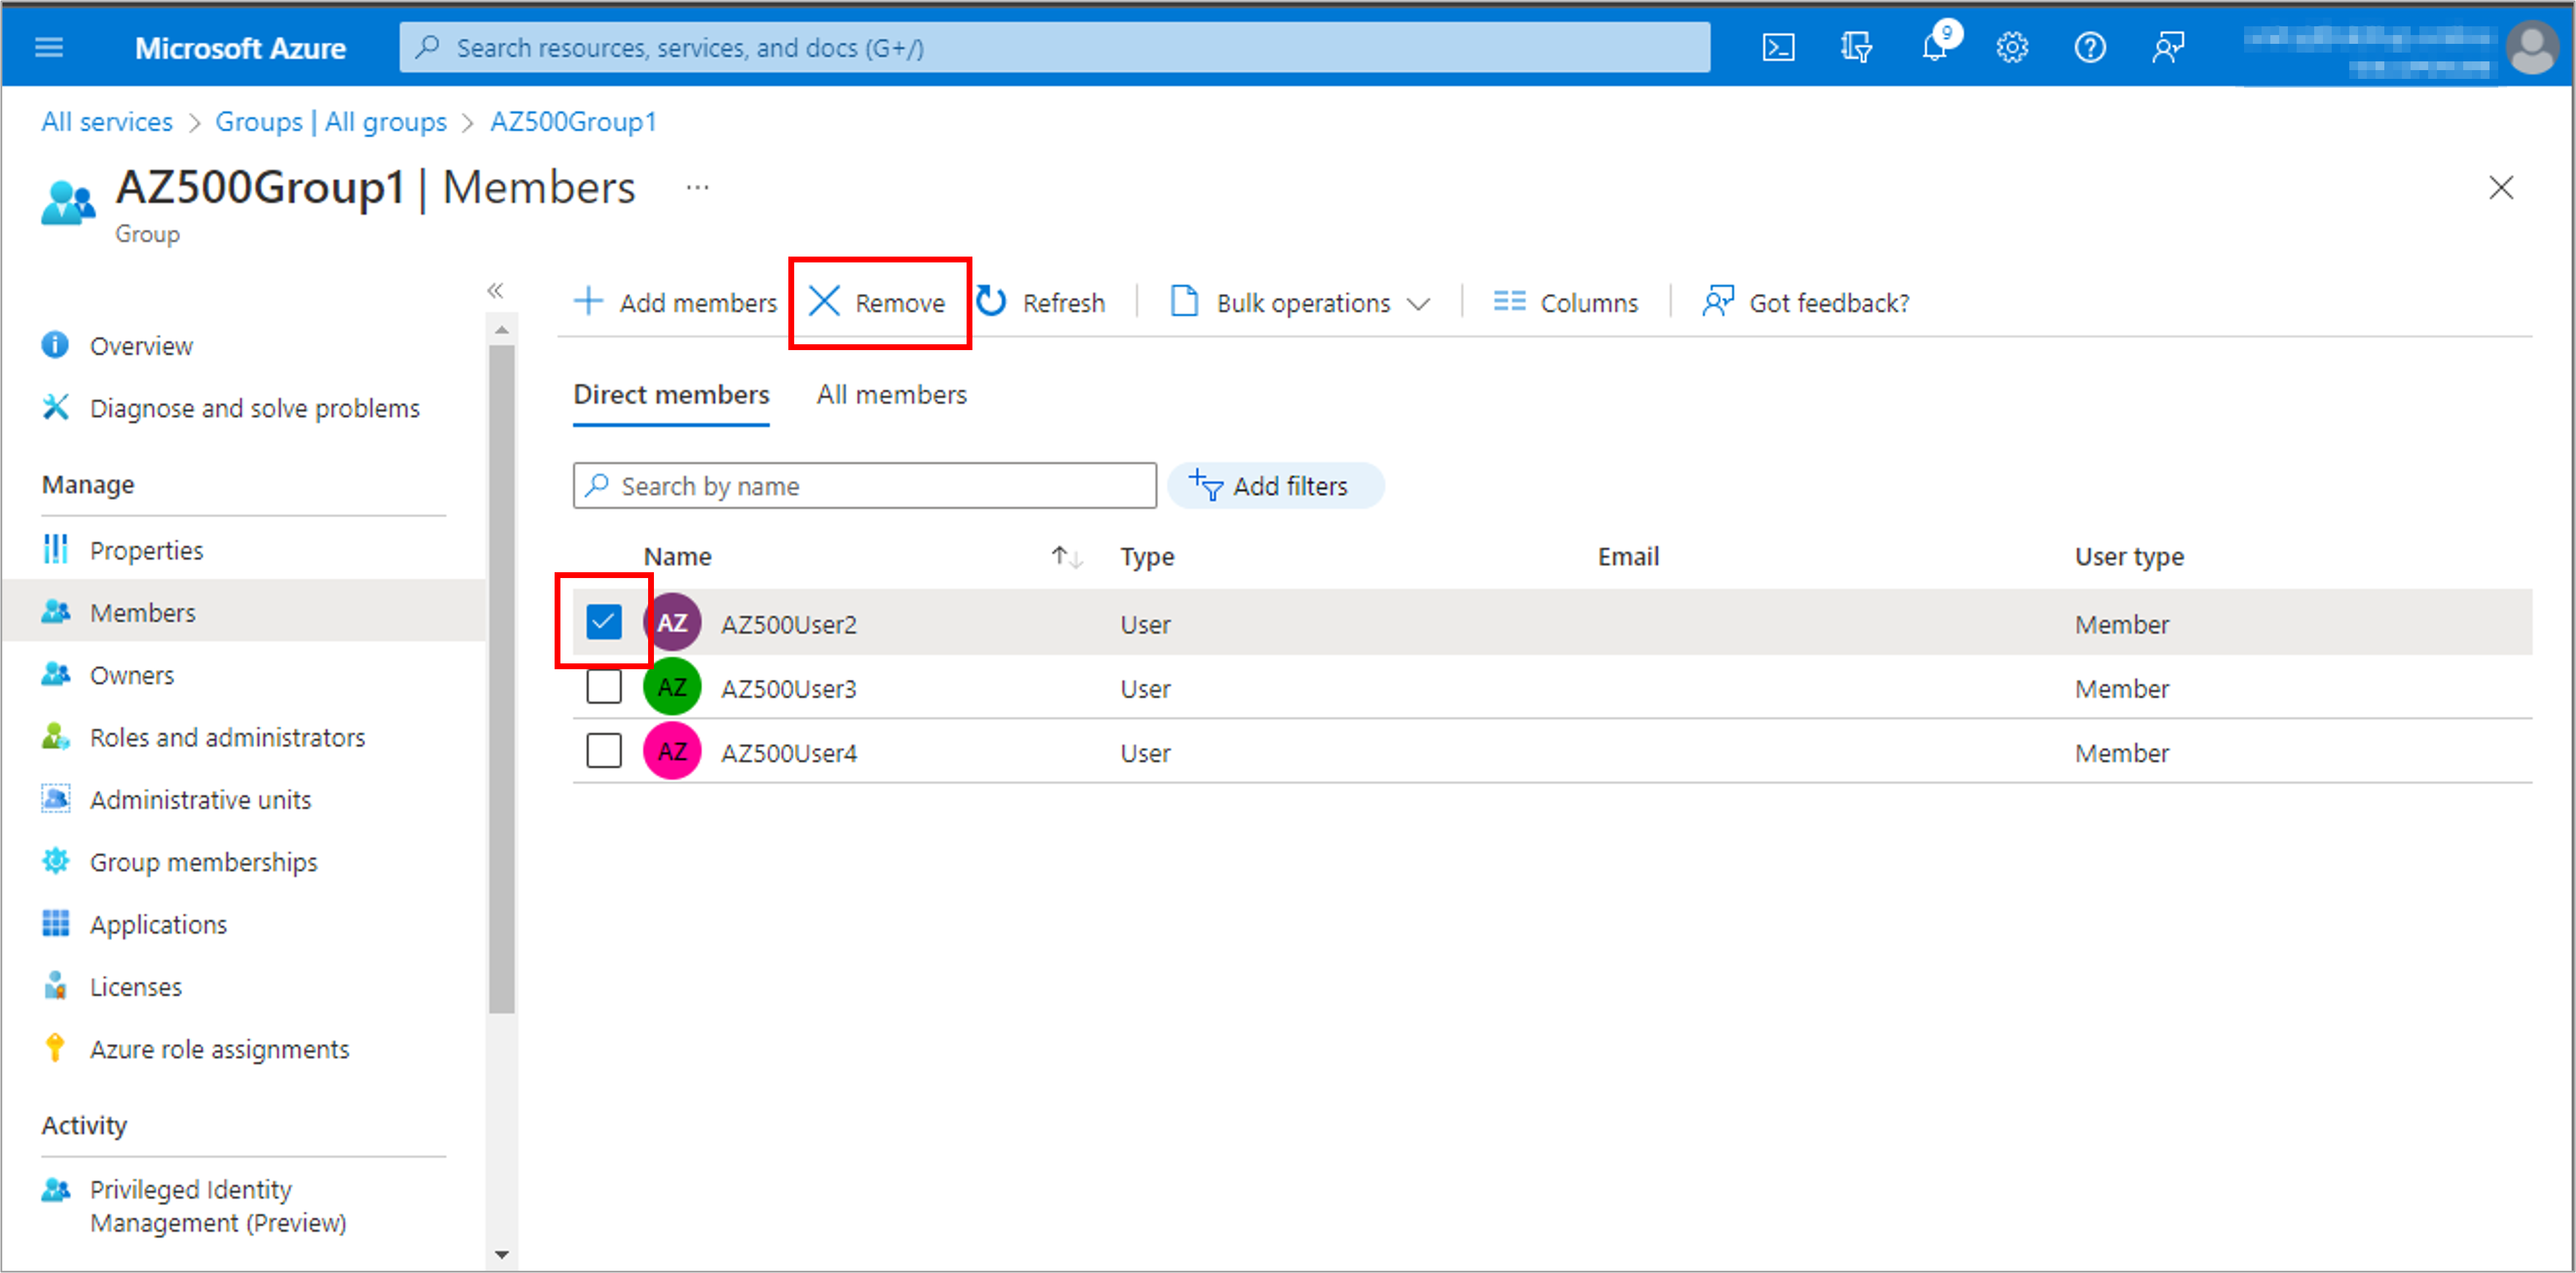
2. Select Members and then select + Add members.

3. Scroll through the list or enter a name in the search box. You can choose multiple names at one time. When you are ready, select the Select button.

4. Similarly, you can add owners.

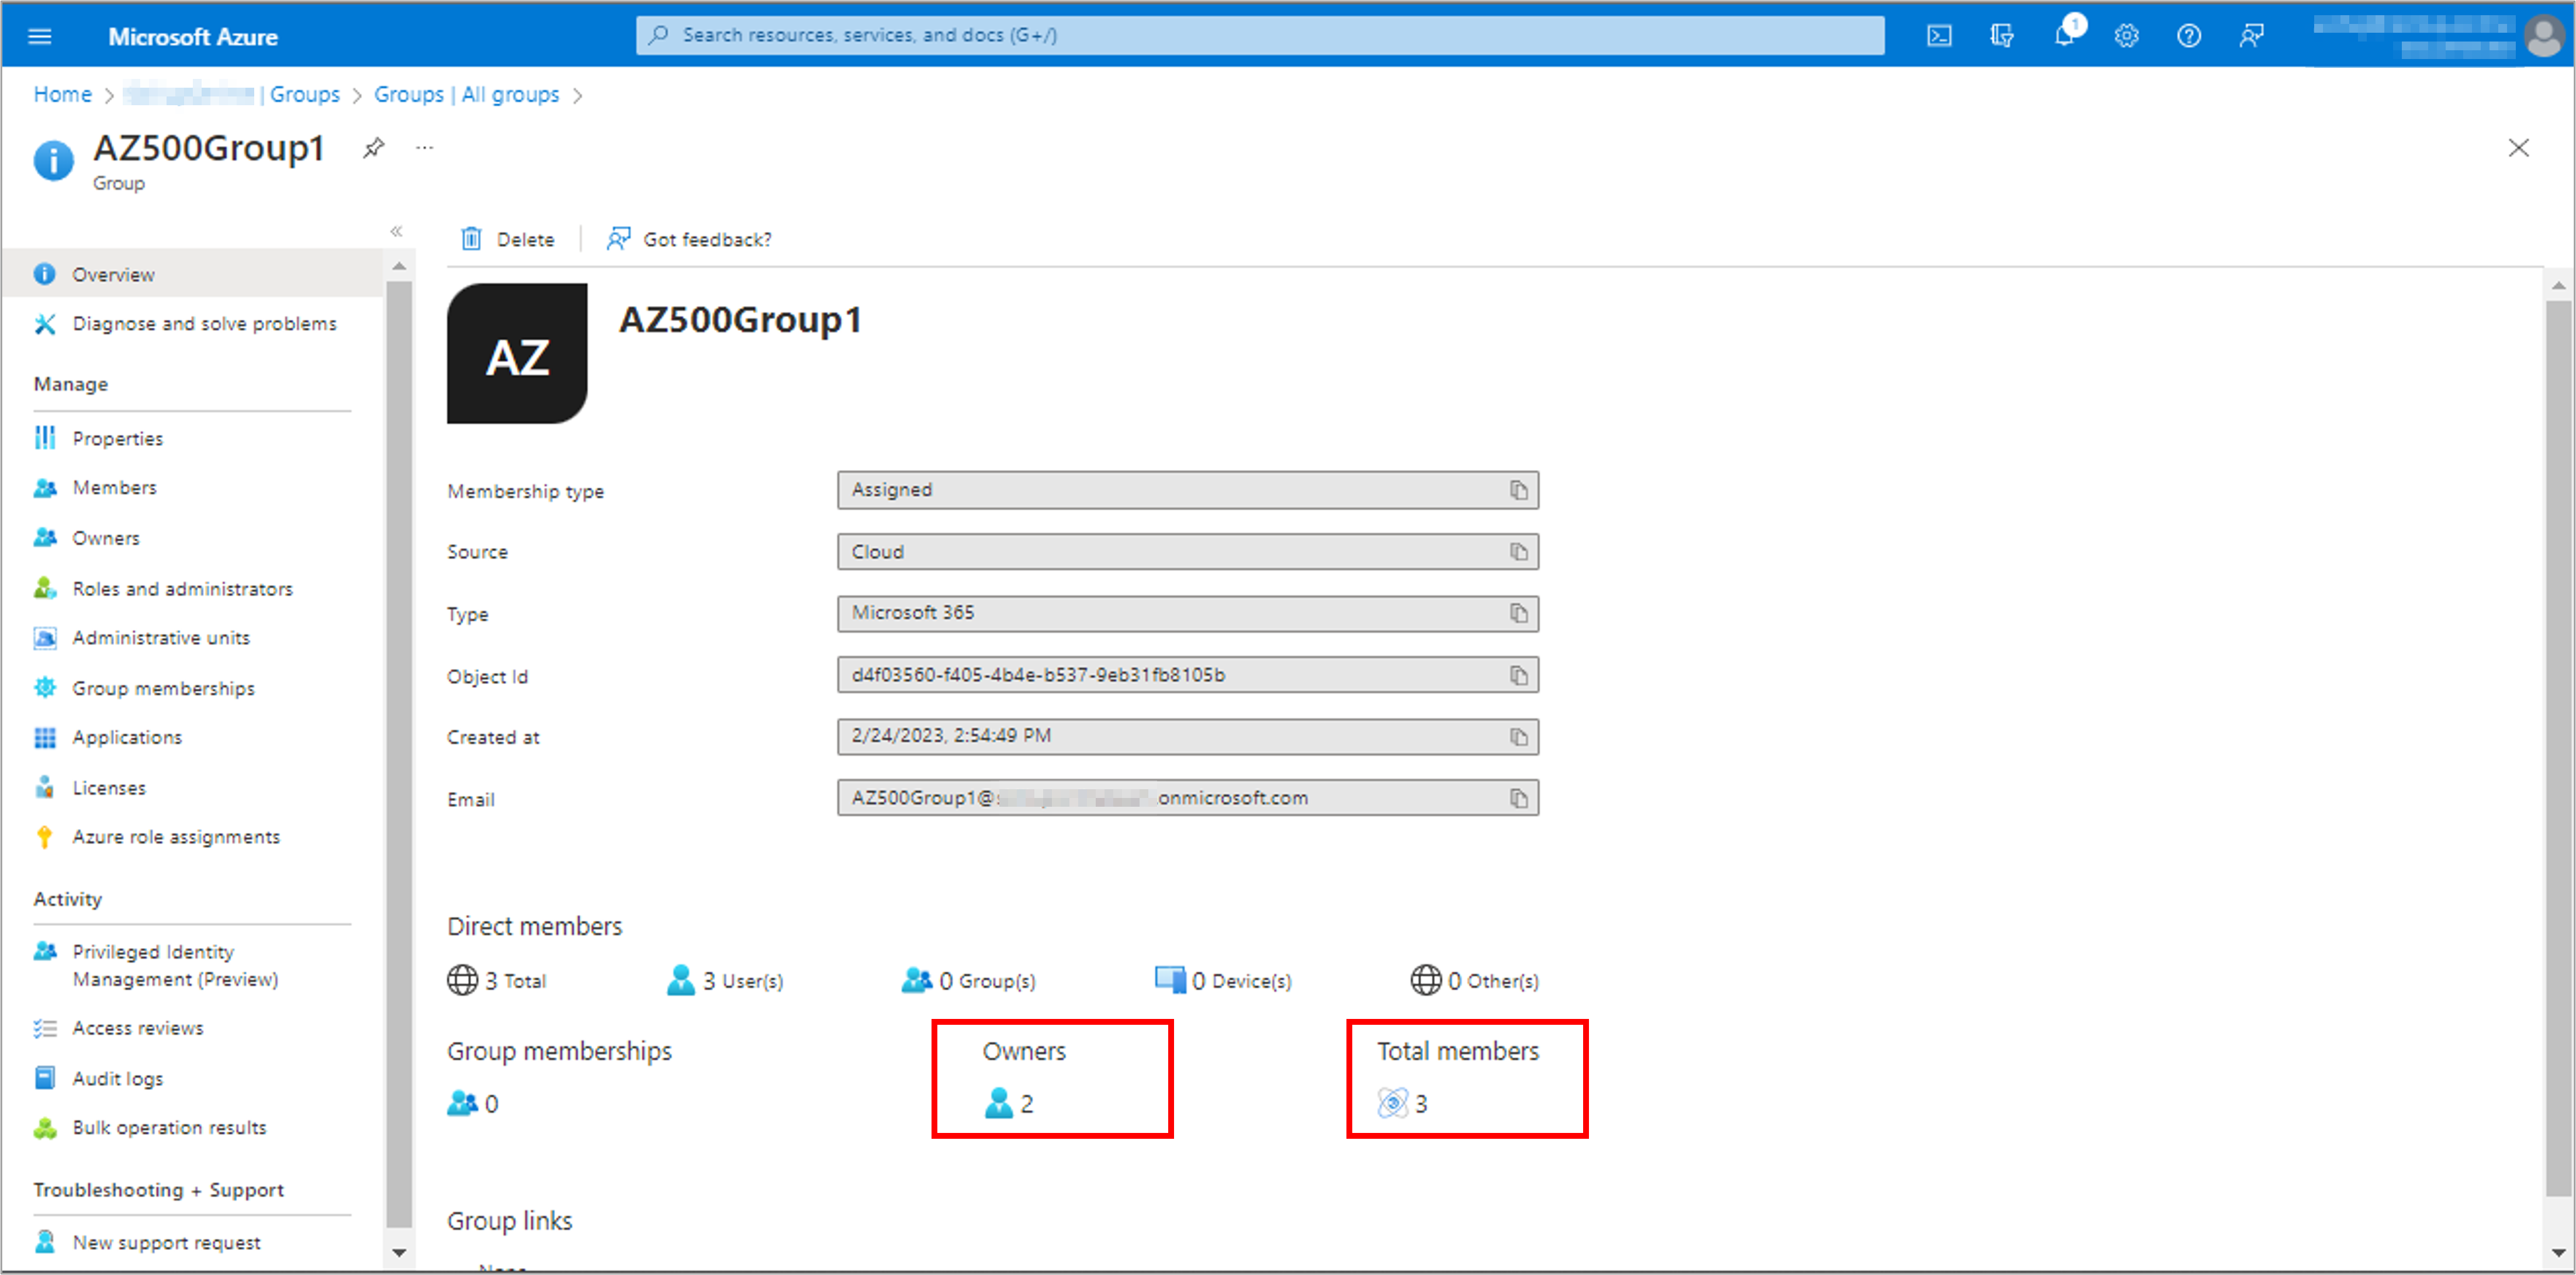
5. The Group Overview page updates to show the number of members who are now added to the group.
6. To remove a group or an owner, select either Members or Owners.
7. Check the box next to a name from the list and select the Remove button.
Task 3: Update group information
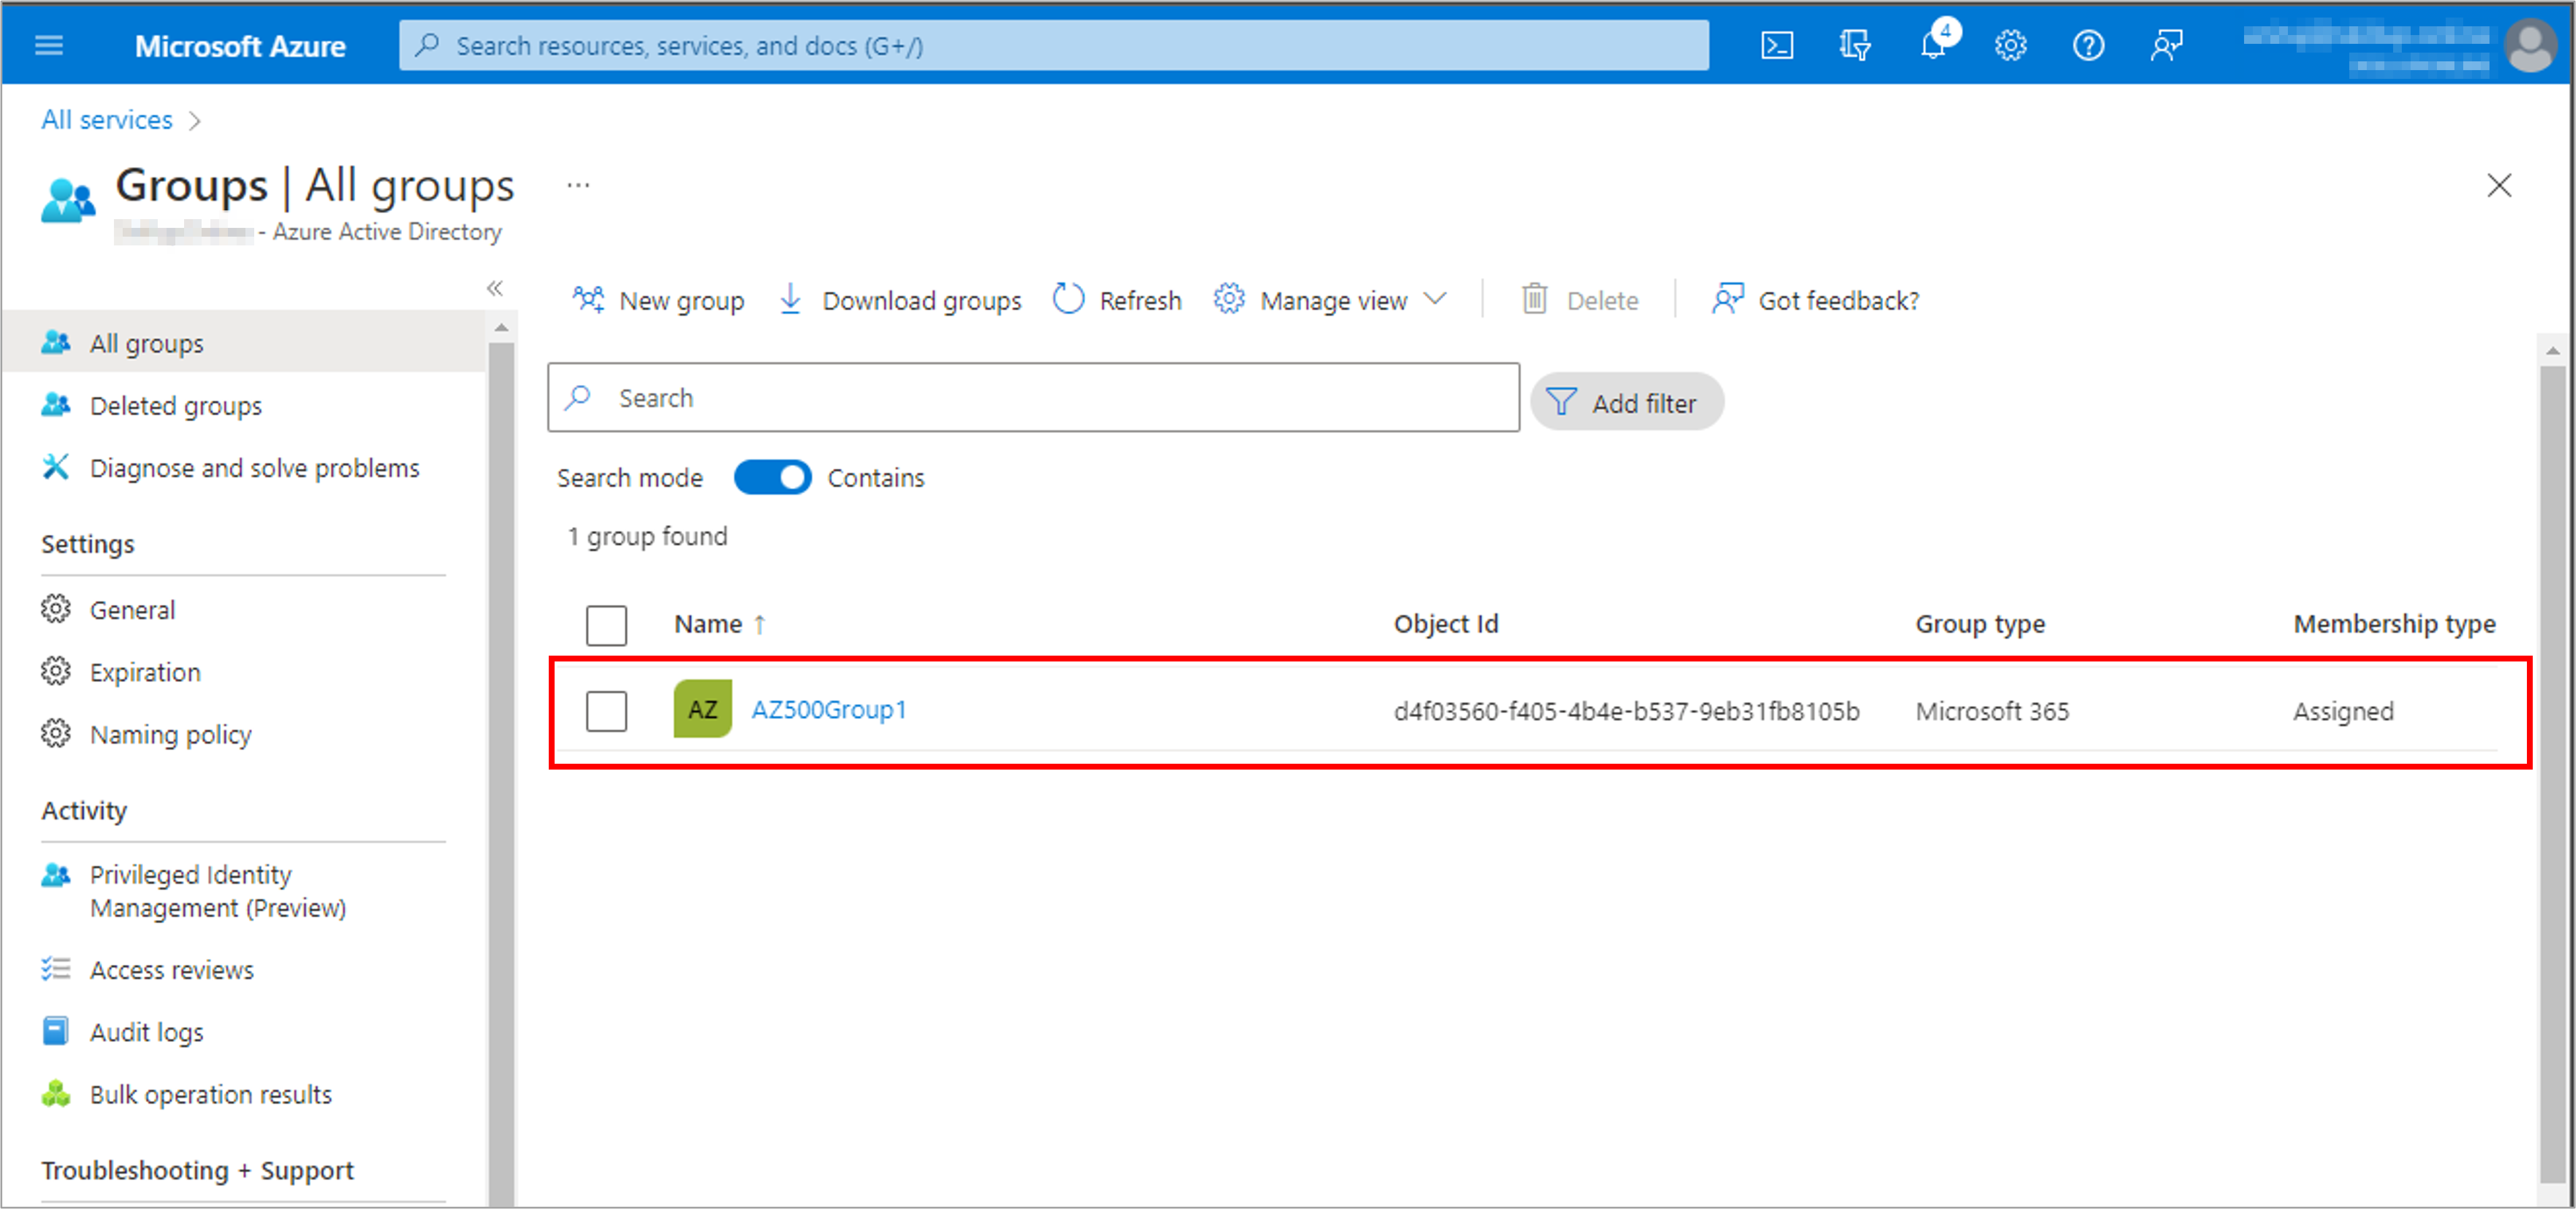
1. Go to Azure Active Directory and select Groups.

2. The Groups | All groups page shows all your active groups.
3. Scroll through the list or enter a group name in the search box. Select the group you need to manage.
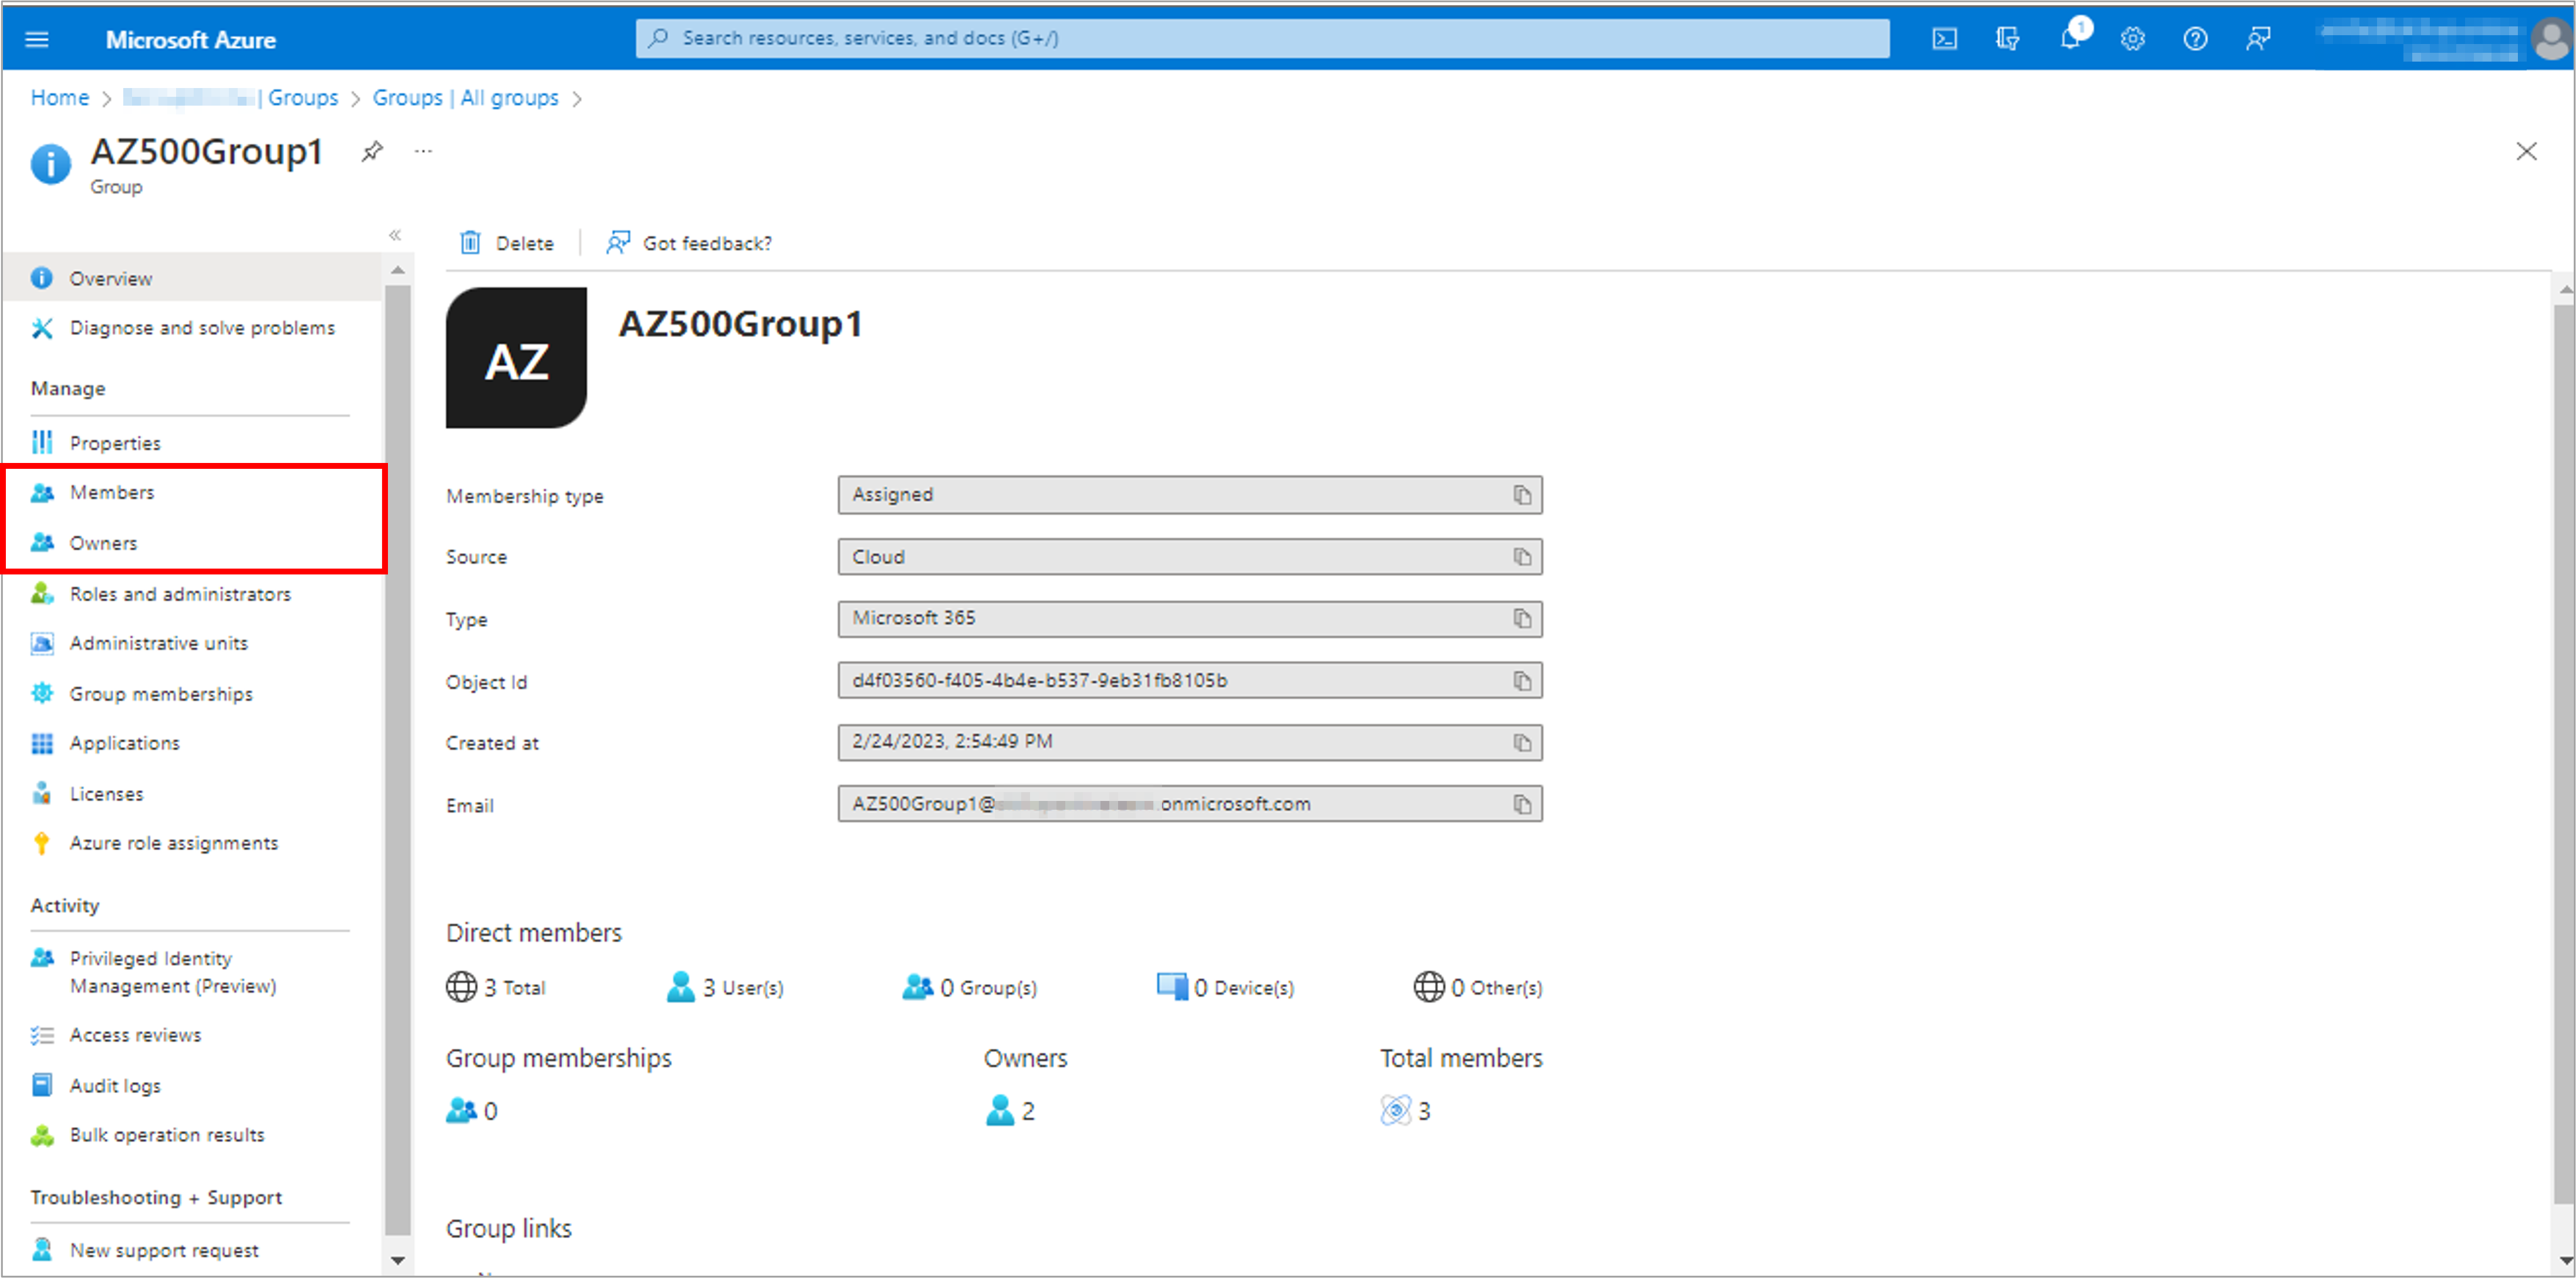
4. Select Properties from the side.
5. Update the General settings information as needed, including:
a. Group name: Edit the existing group name.
b. Group description: Edit the existing group description.
c. Group type: You cannot change the type of group after it has been created. To change the Group type, you must delete the group and create a new one.
d. Membership type: Change the membership type. If you enabled the Azure AD roles can be assigned to the group option, you cannot change the membership type.
e. Object ID: You cannot change the Object ID, but you can copy it to use in your PowerShell commands for the group.
6. Select the Save button present at the top menu to save any changes.

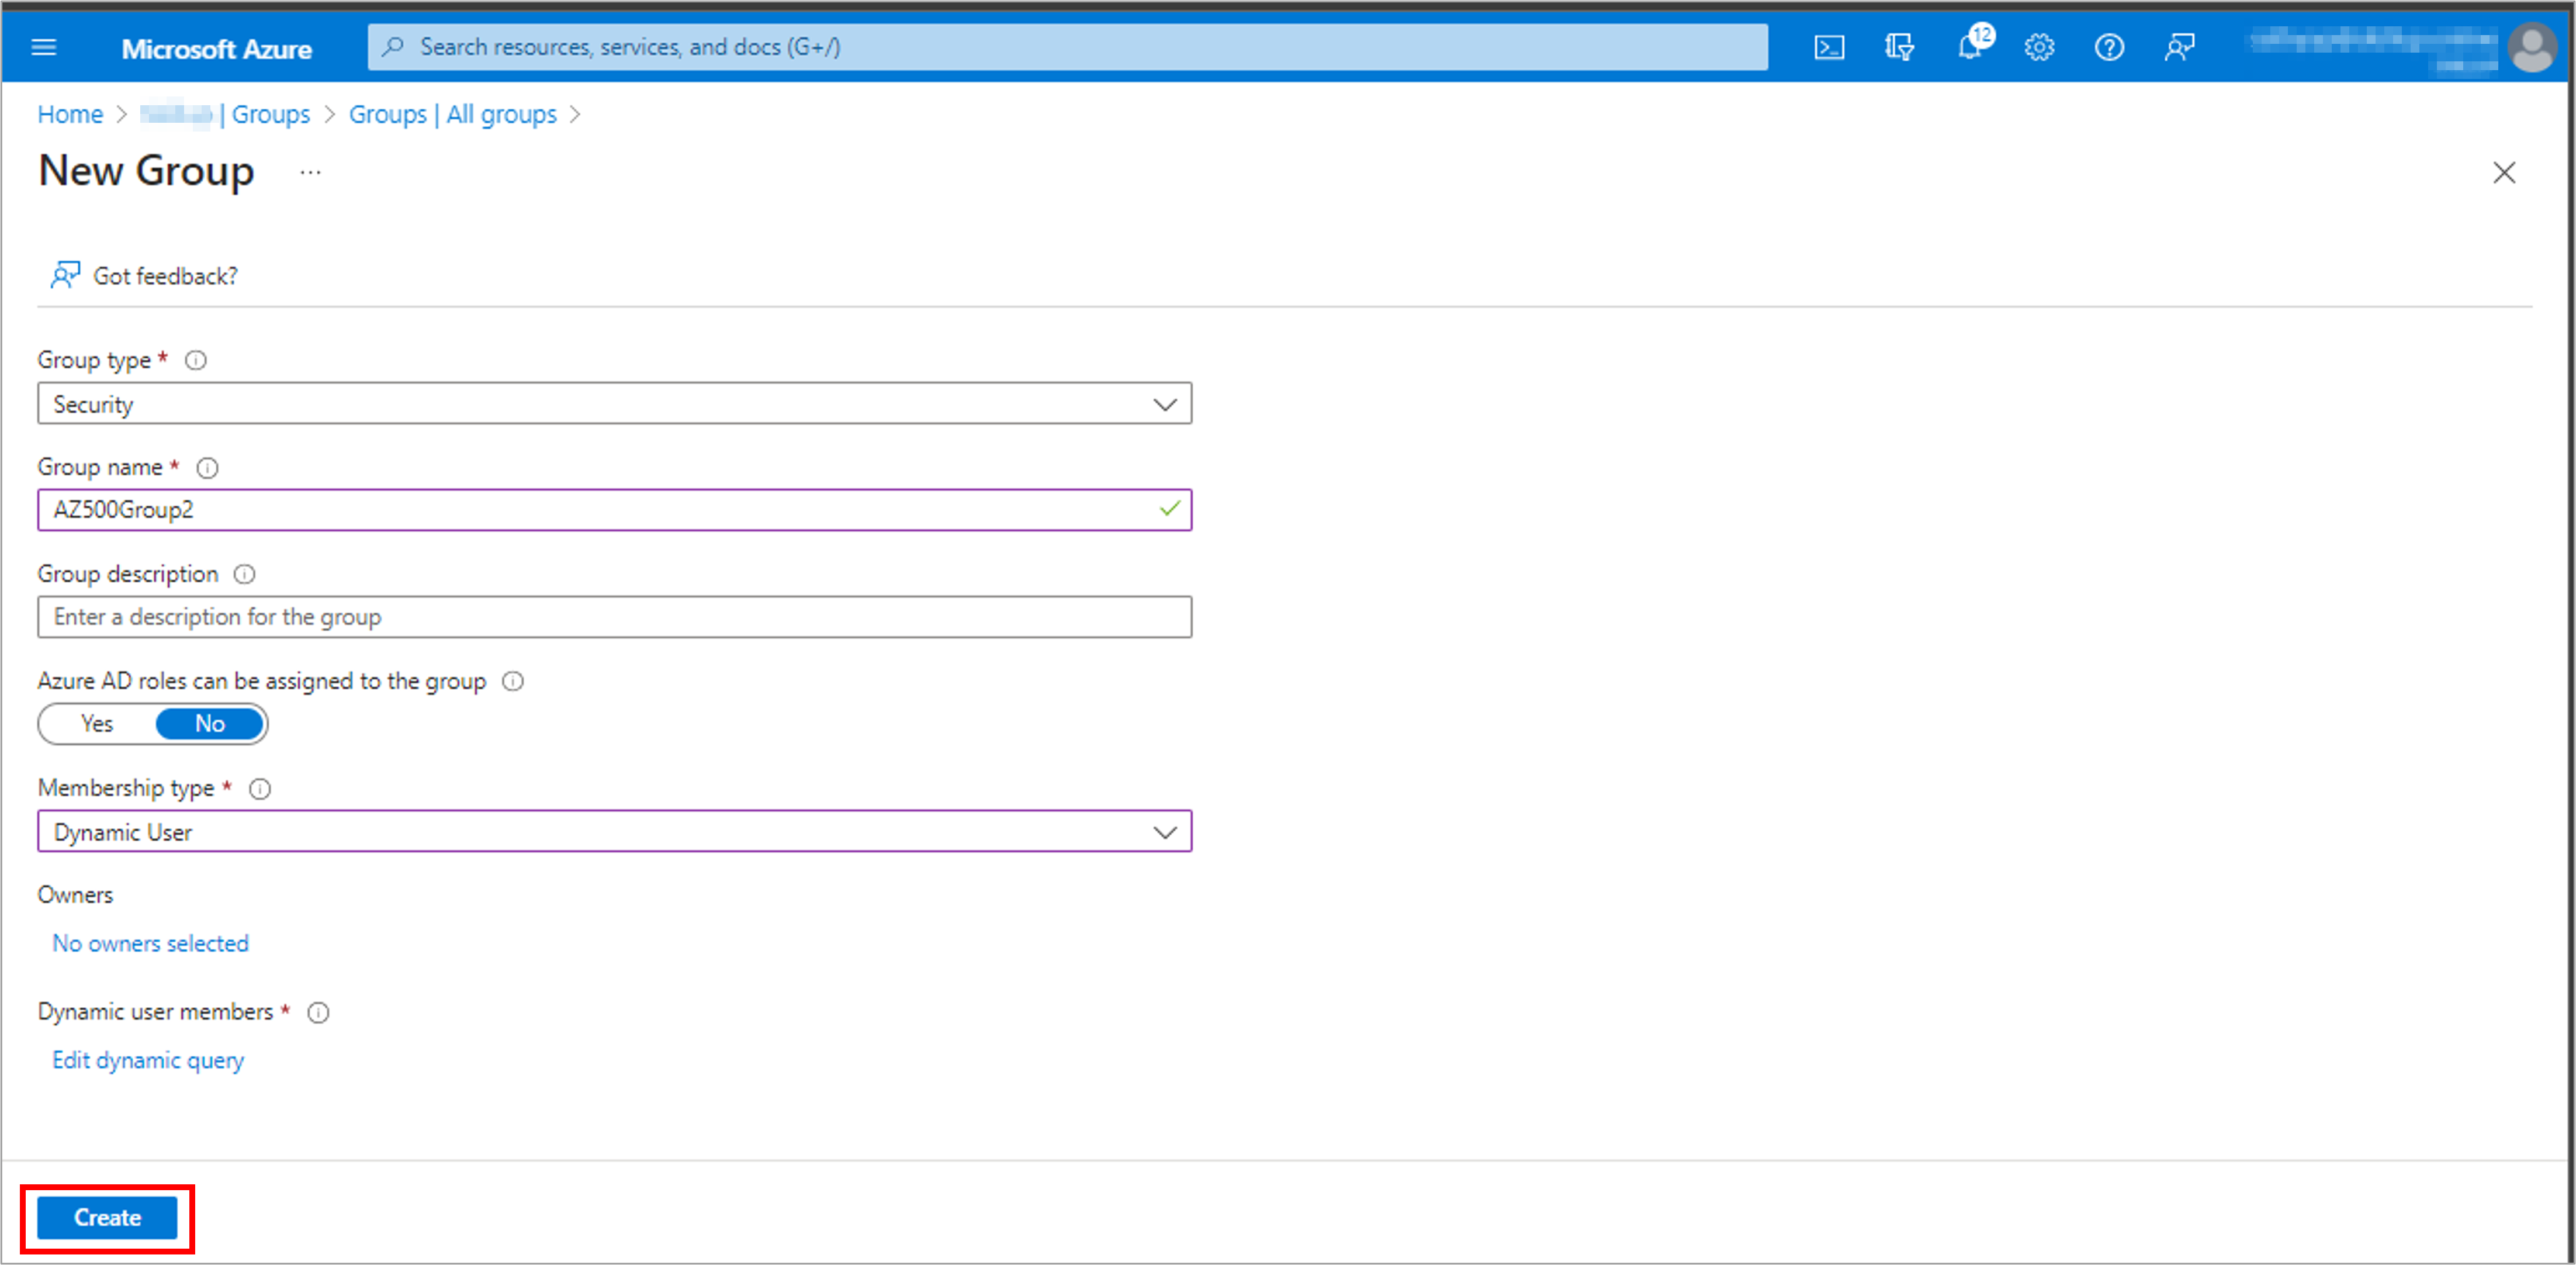
Task 4: Create a dynamic group
1. Go to Azure Active Directory and select Groups.

2. Select New group from the menu to create a new group.
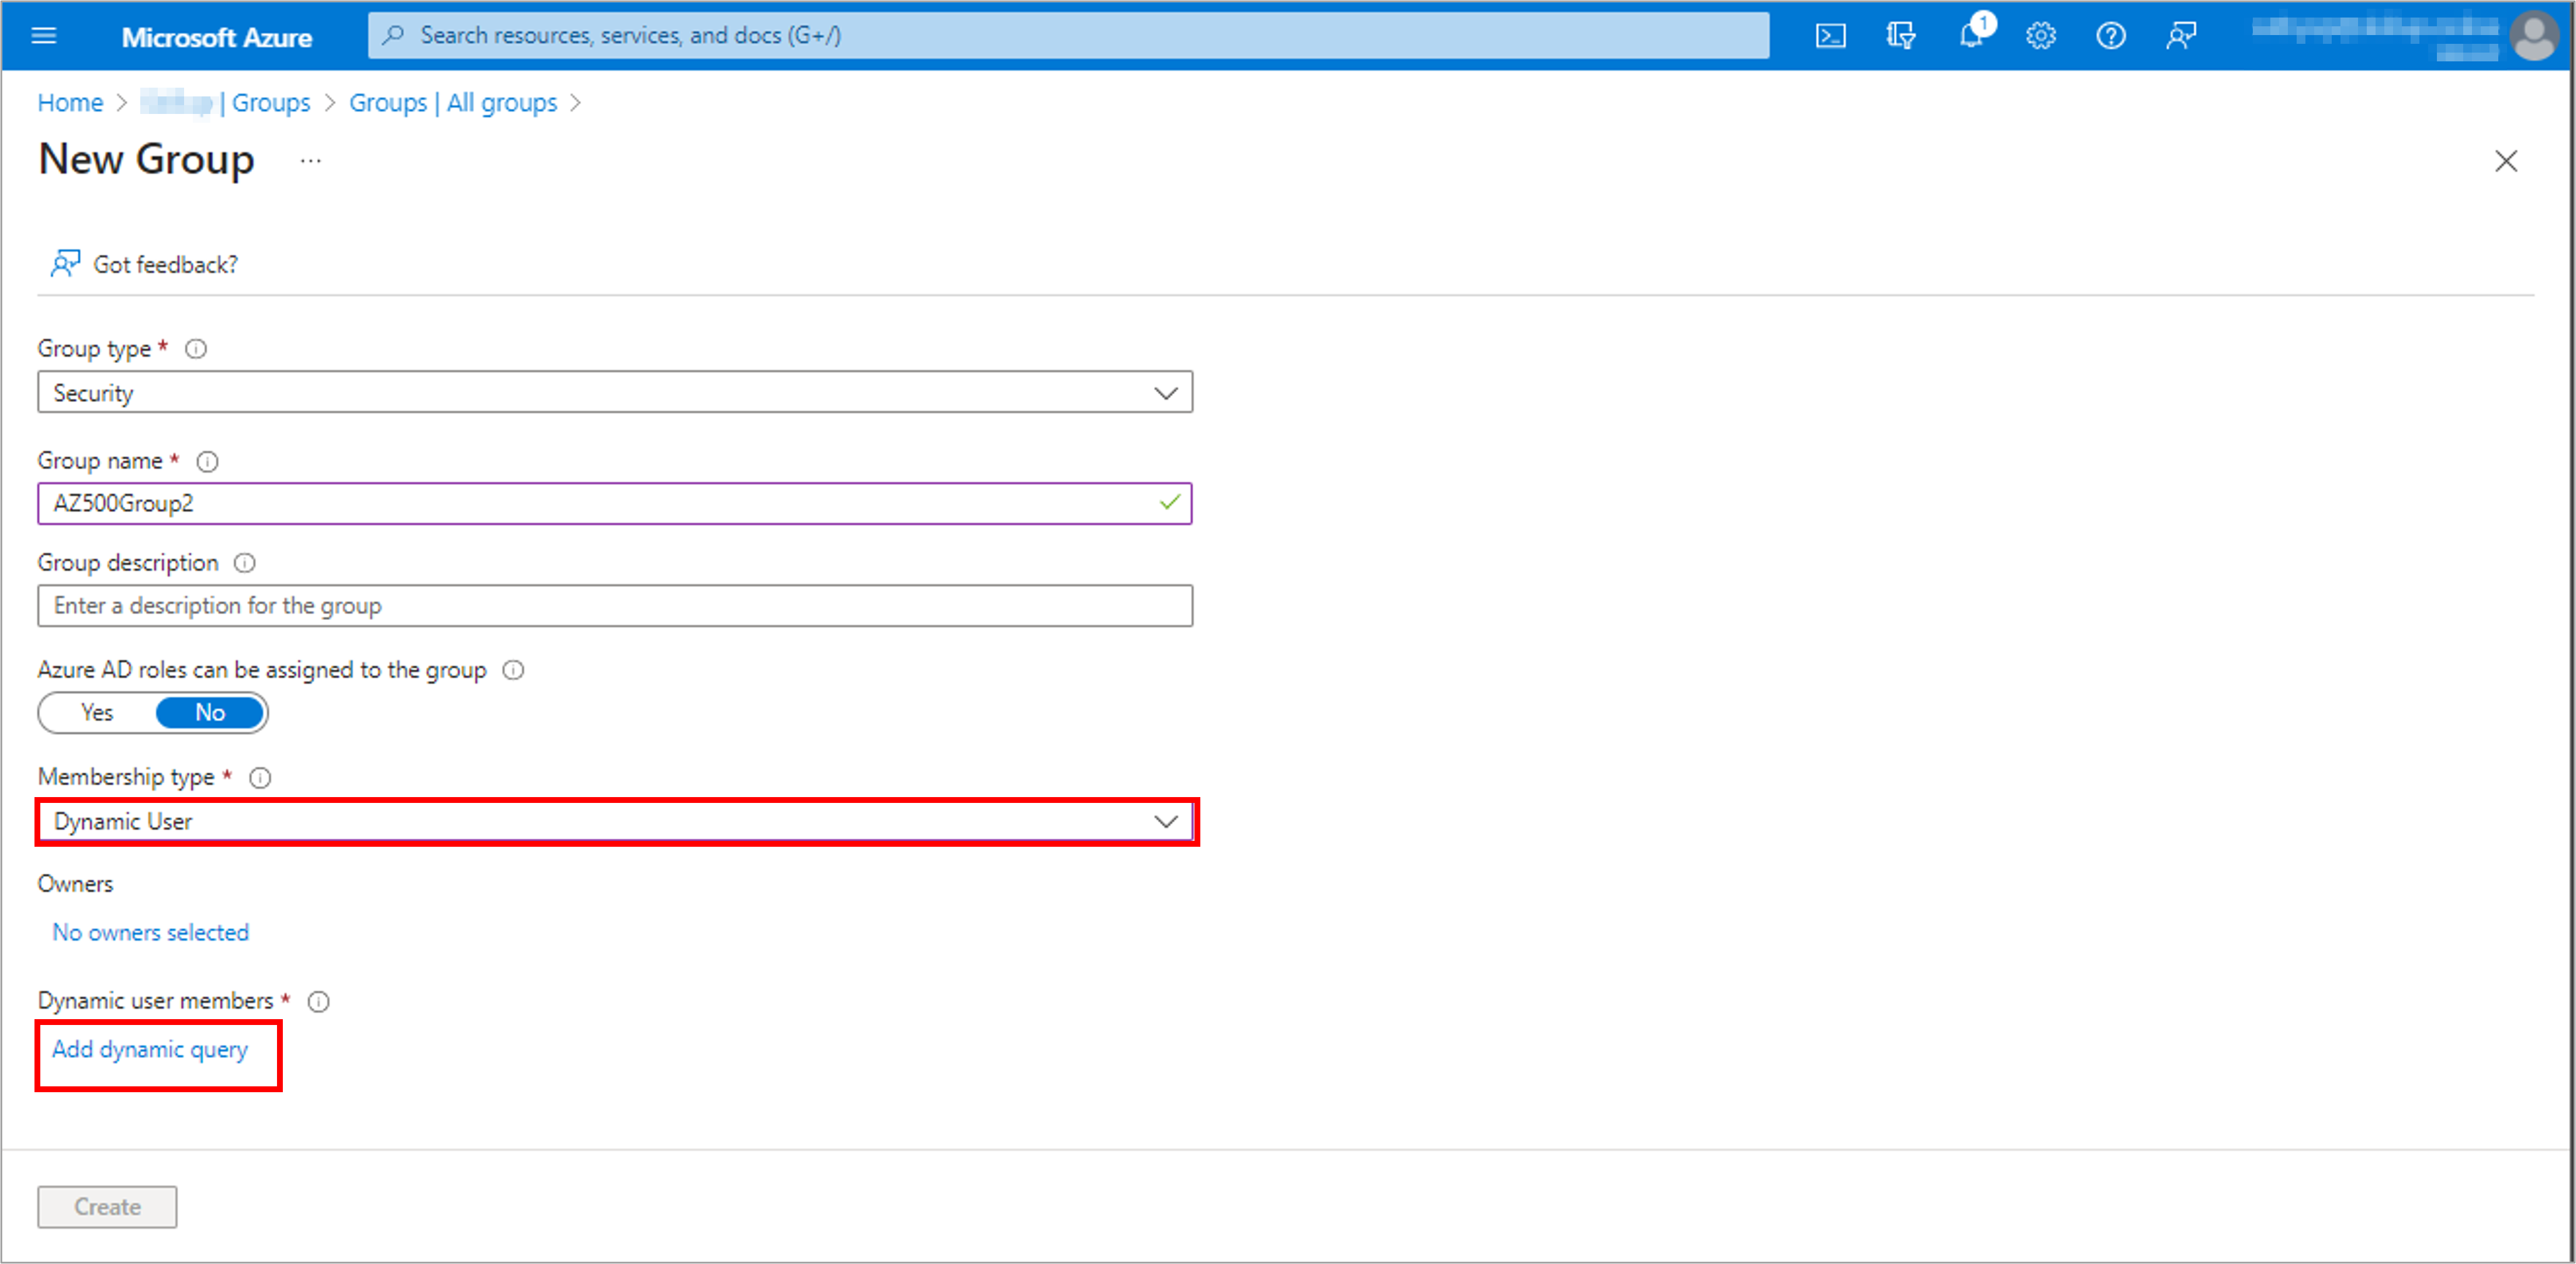
3. On the New Group page, enter a name and a description for the new group. Select a Membership type as Dynamic User. Make sure the toggle here should be set to No. Select Add dynamic query under Dynamic user members.
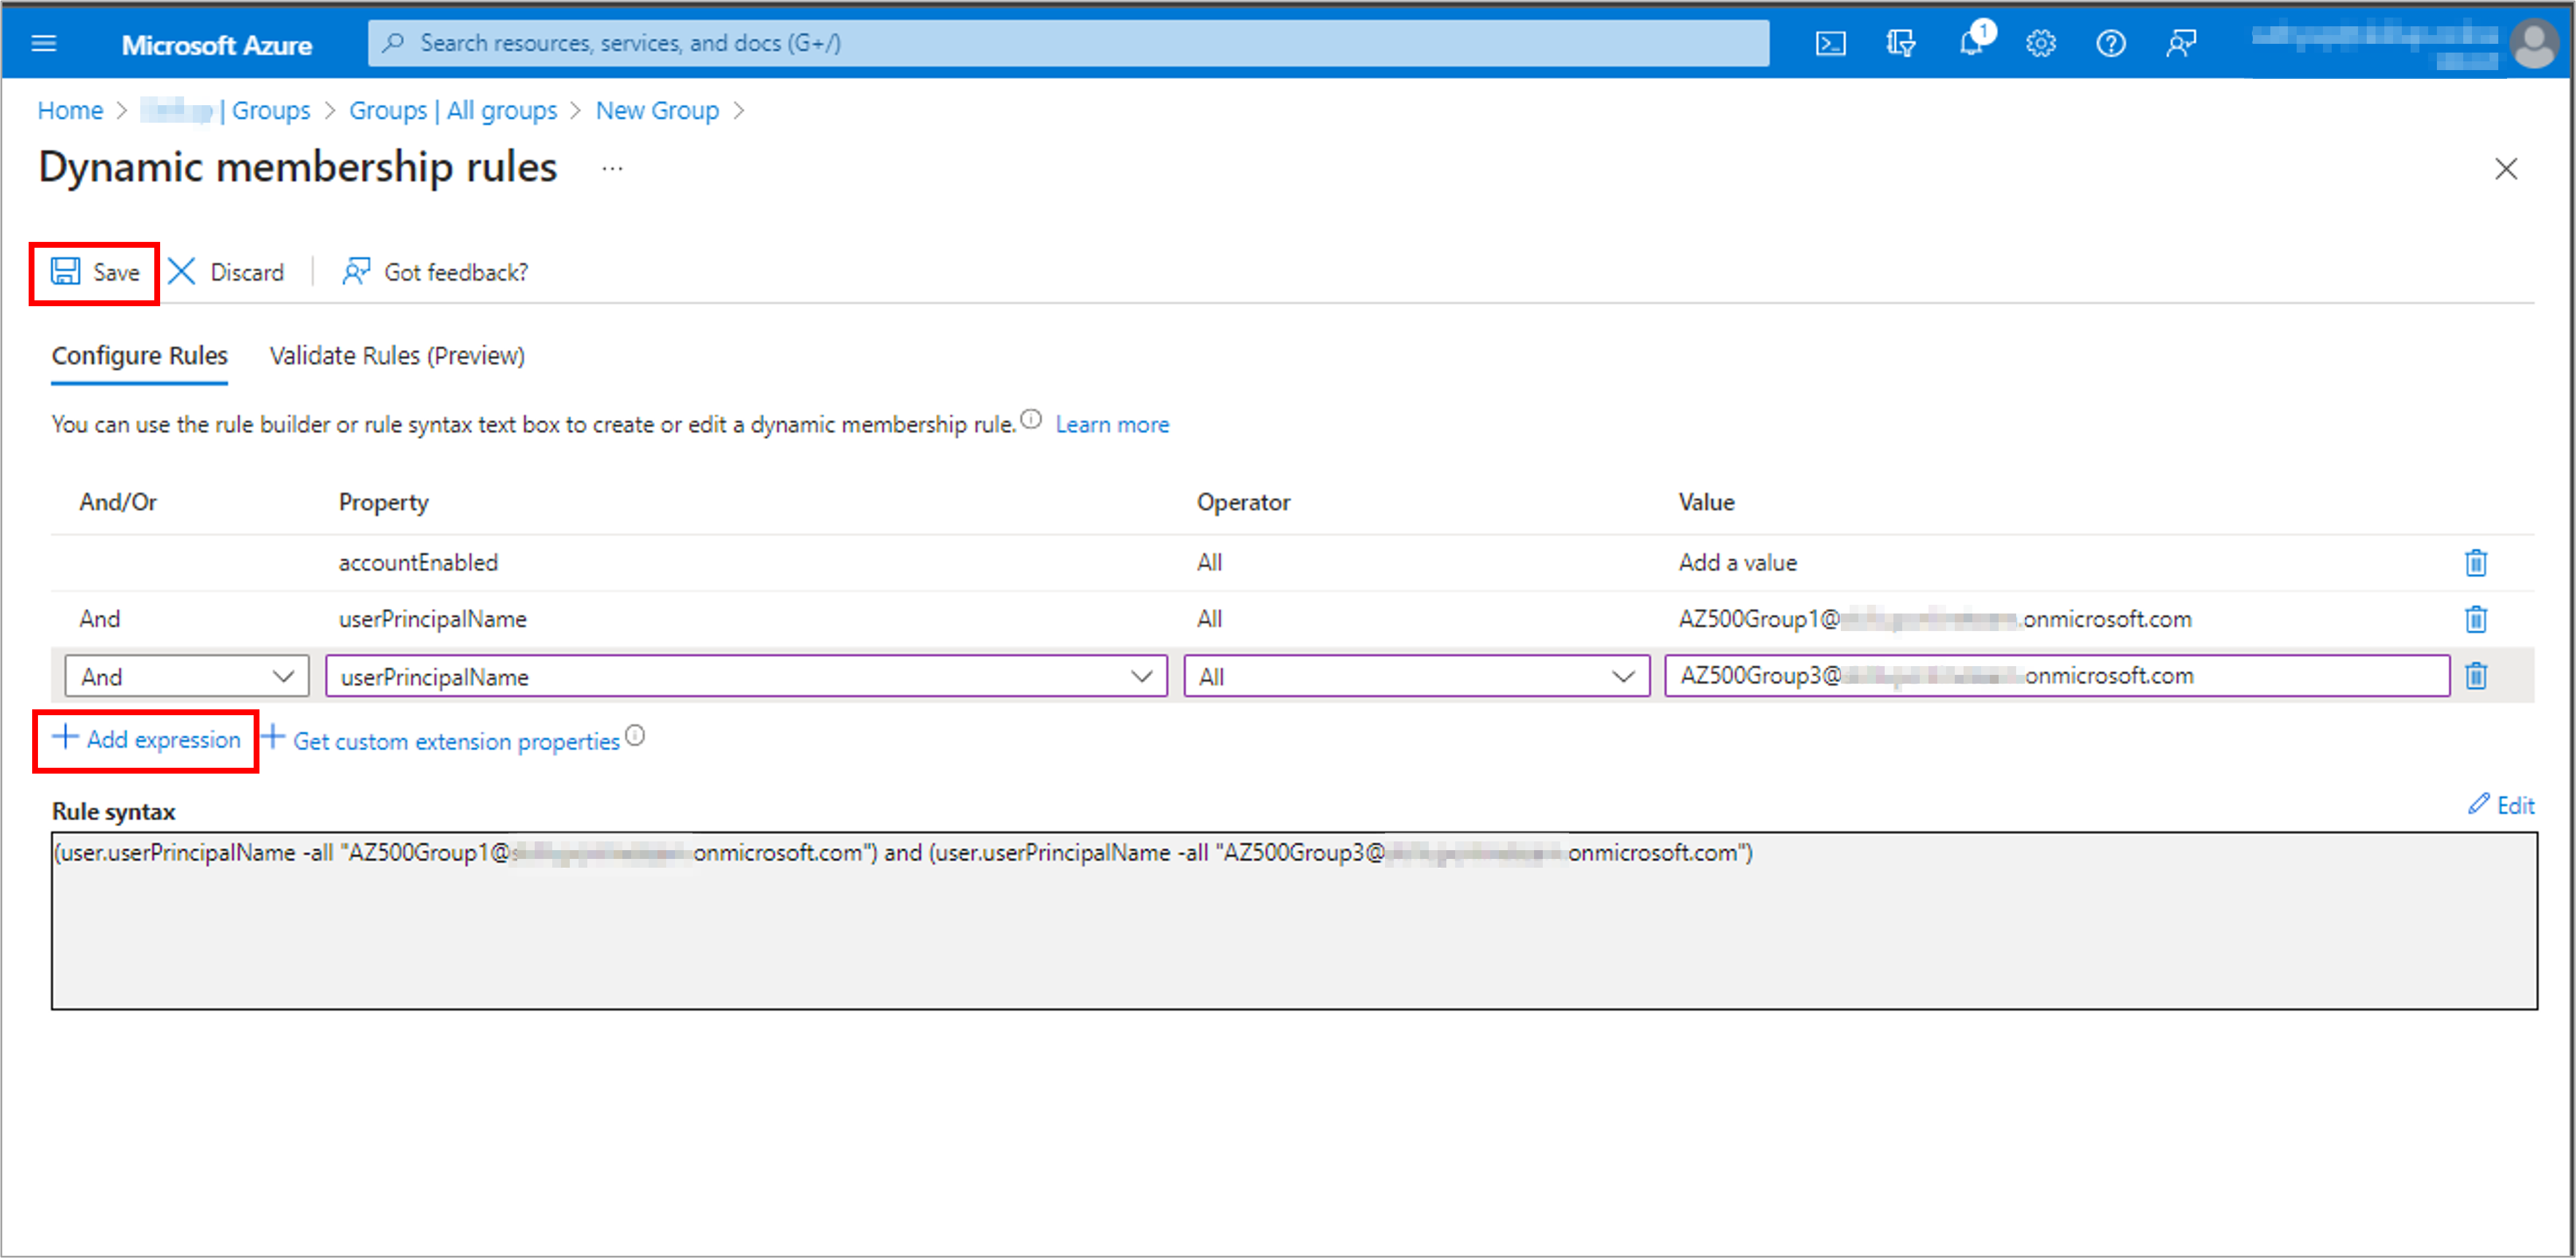
4. The rule builder supports up to five expressions. To add more than five expressions, you must use the Rule syntax text box.
5. After creating the rule, select Save.
6. Select Create on the New Group page to create the group.
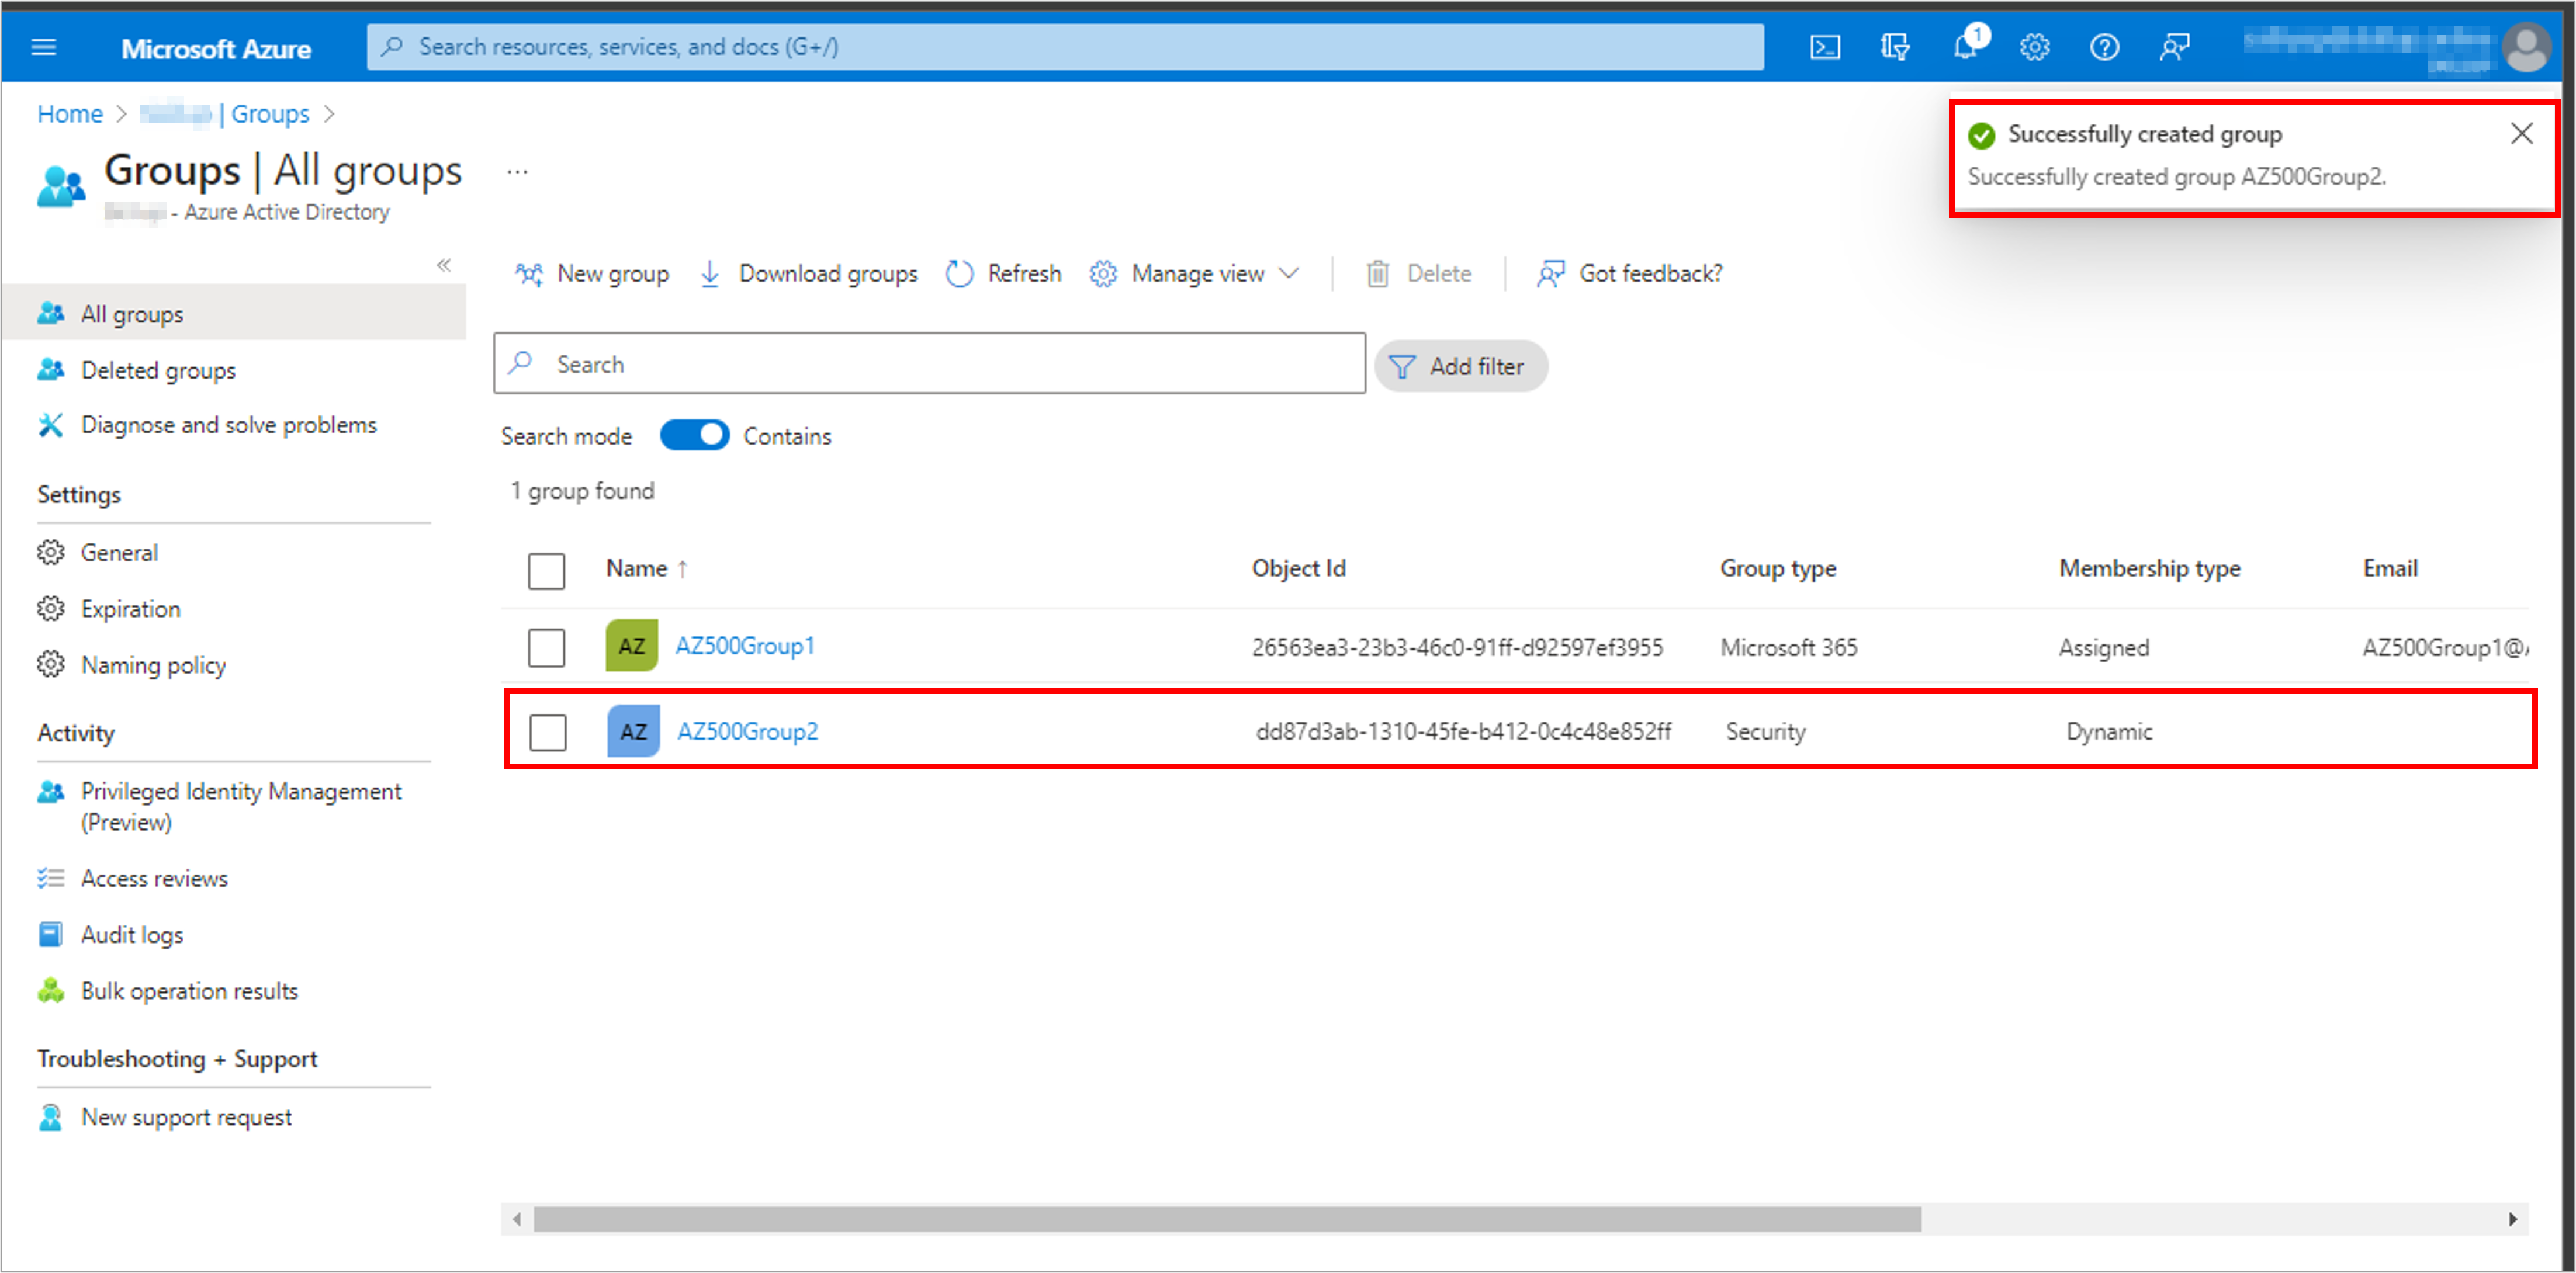
7. You can view the newly created group with the membership type as Dynamic on the Groups | All groups page.
Task 5: Delete the group
Note: You must have a Global Administrator, Privileged Authentication Administrator, or User Administrator role assignment to delete groups in your organization.
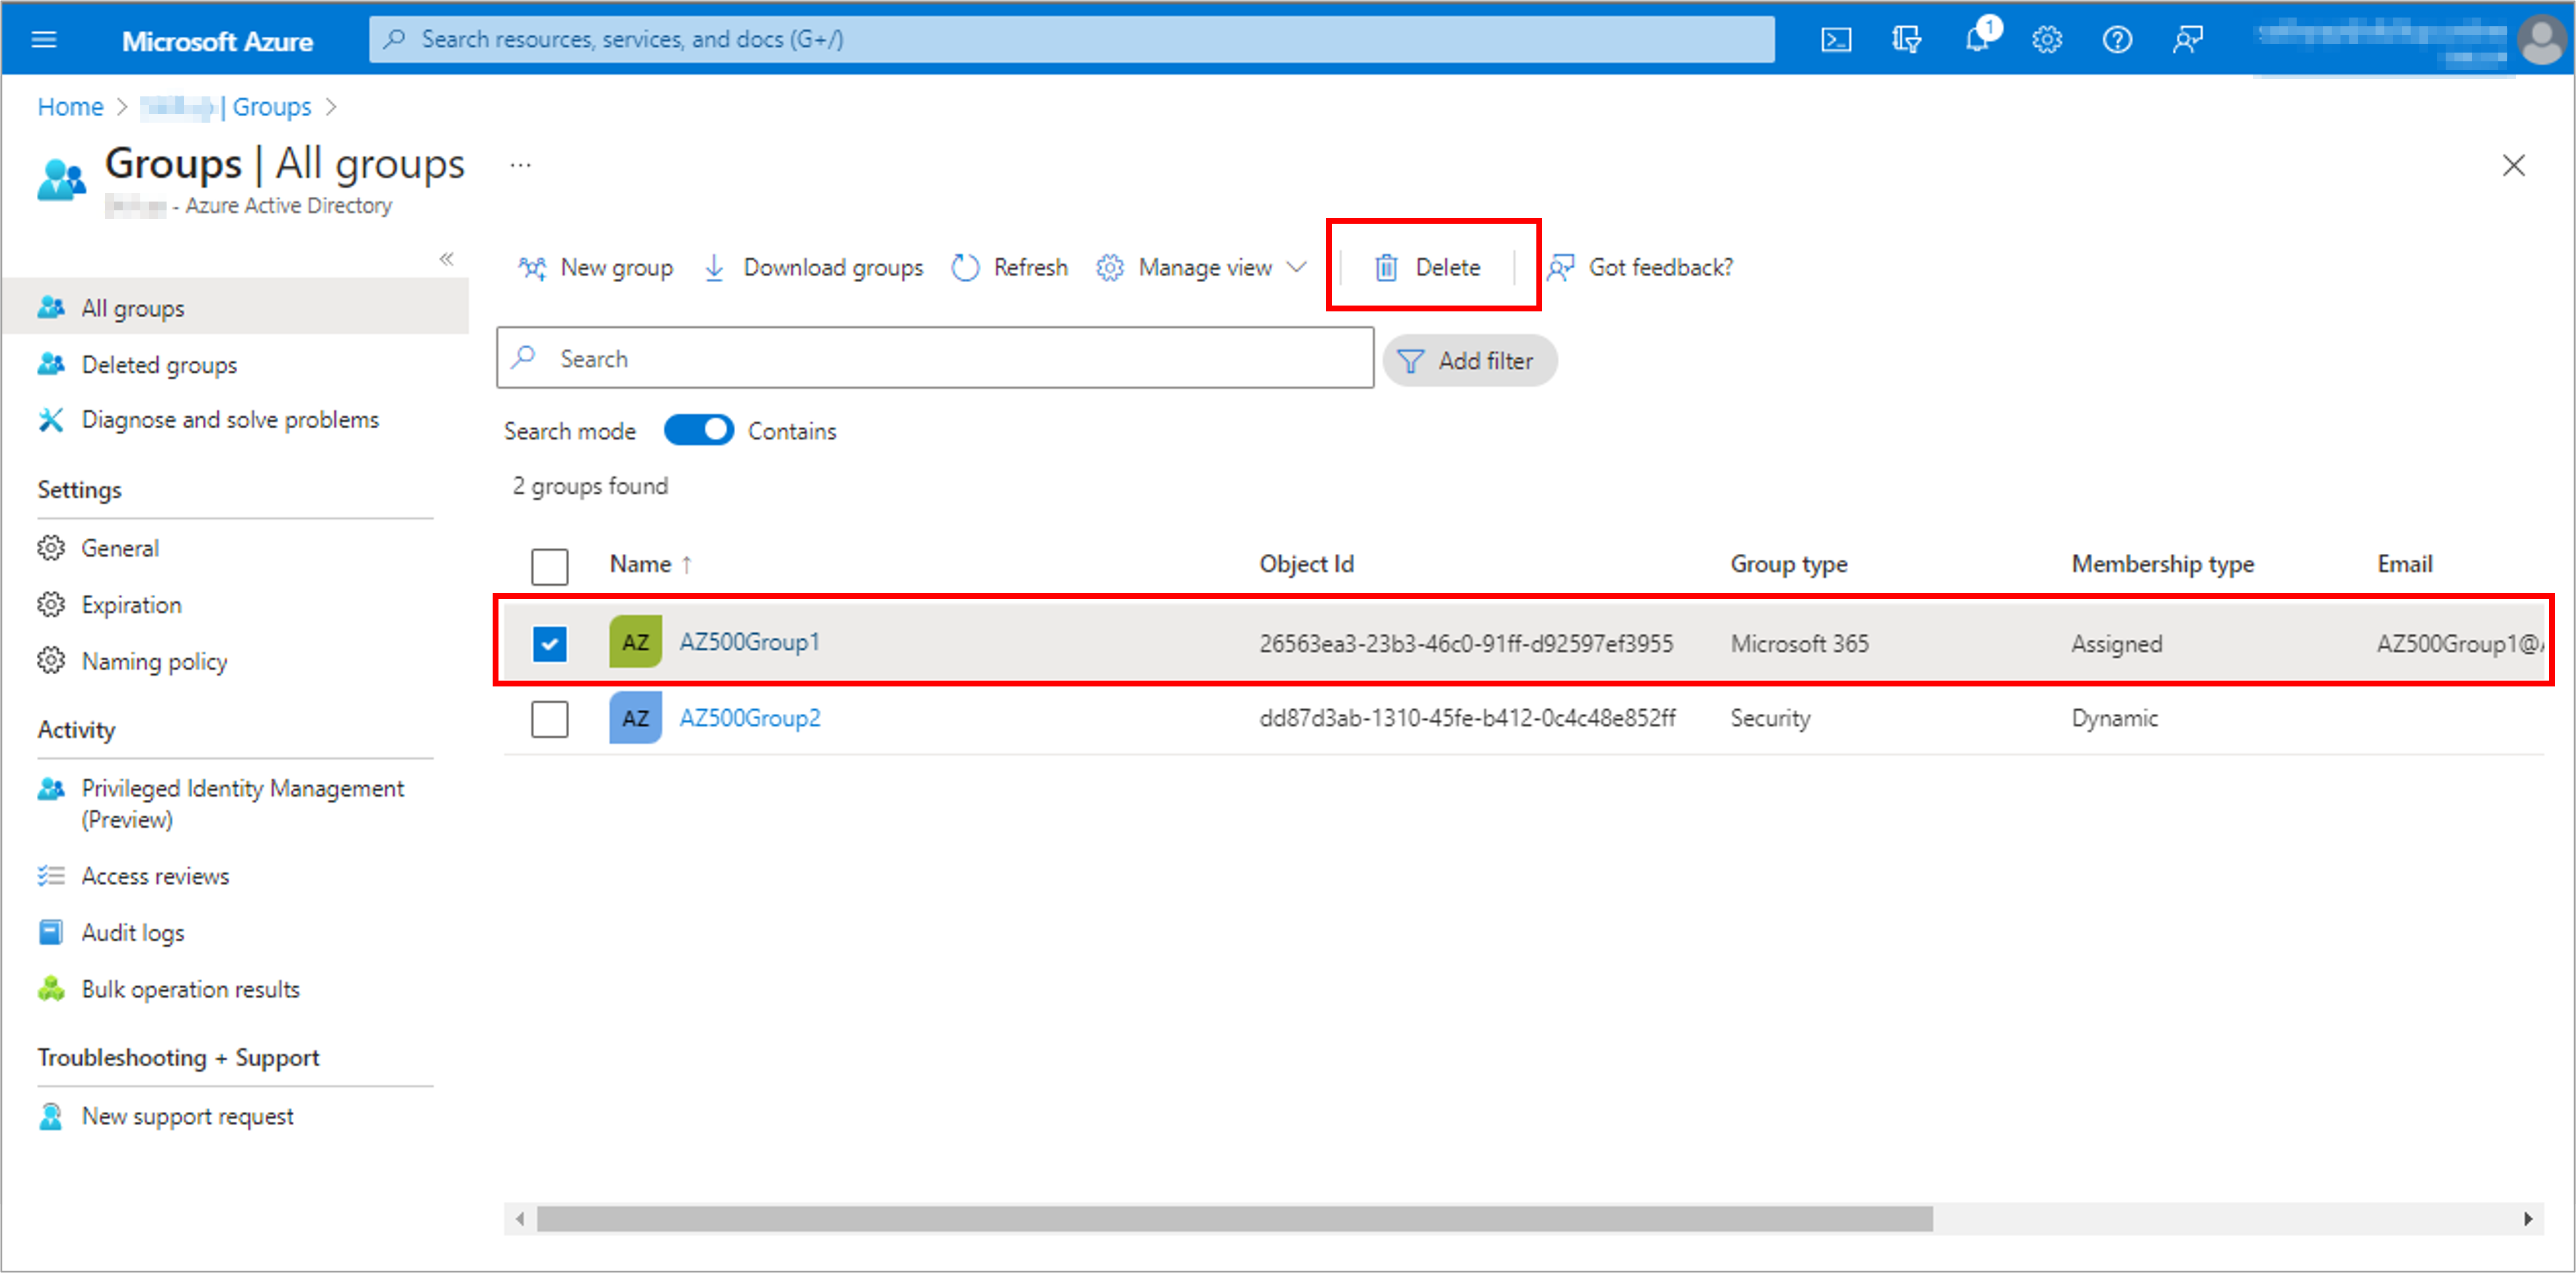
1. Go to Azure Active Directory and select Groups.
2. Search for and select the group you want to delete.
3. Select Delete.
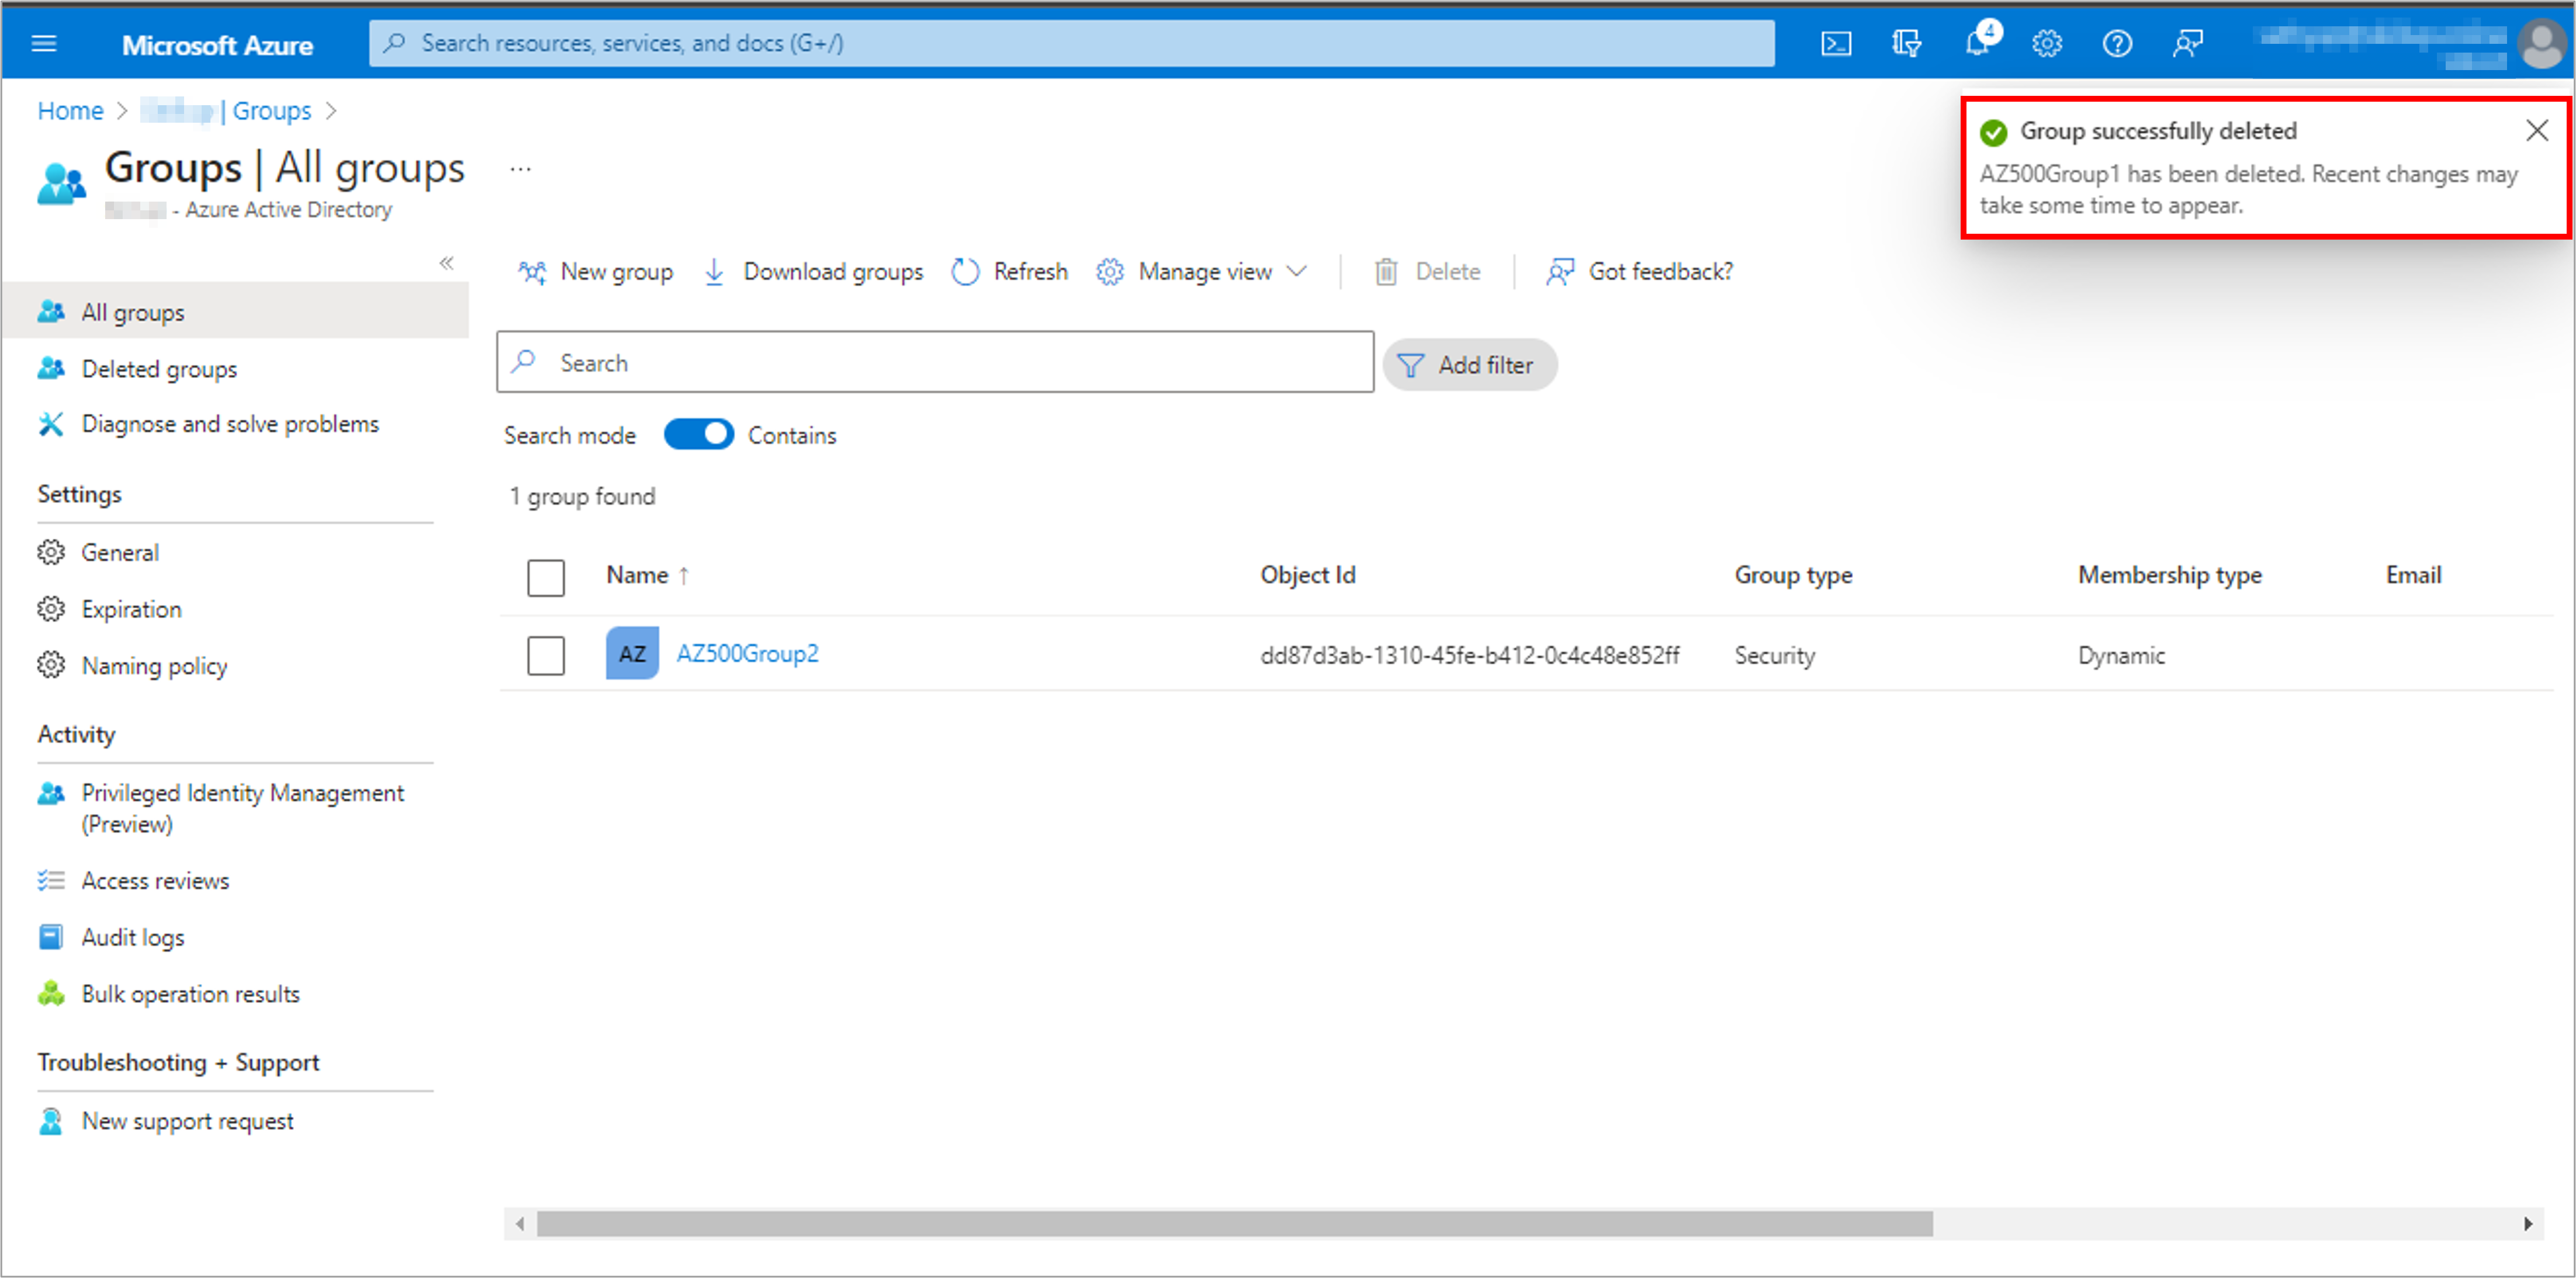
4. You can view that the group has been deleted from the list.
Task 6: Restore deleted group
1. Select Azure Active Directory, select Groups, and then select Deleted groups.
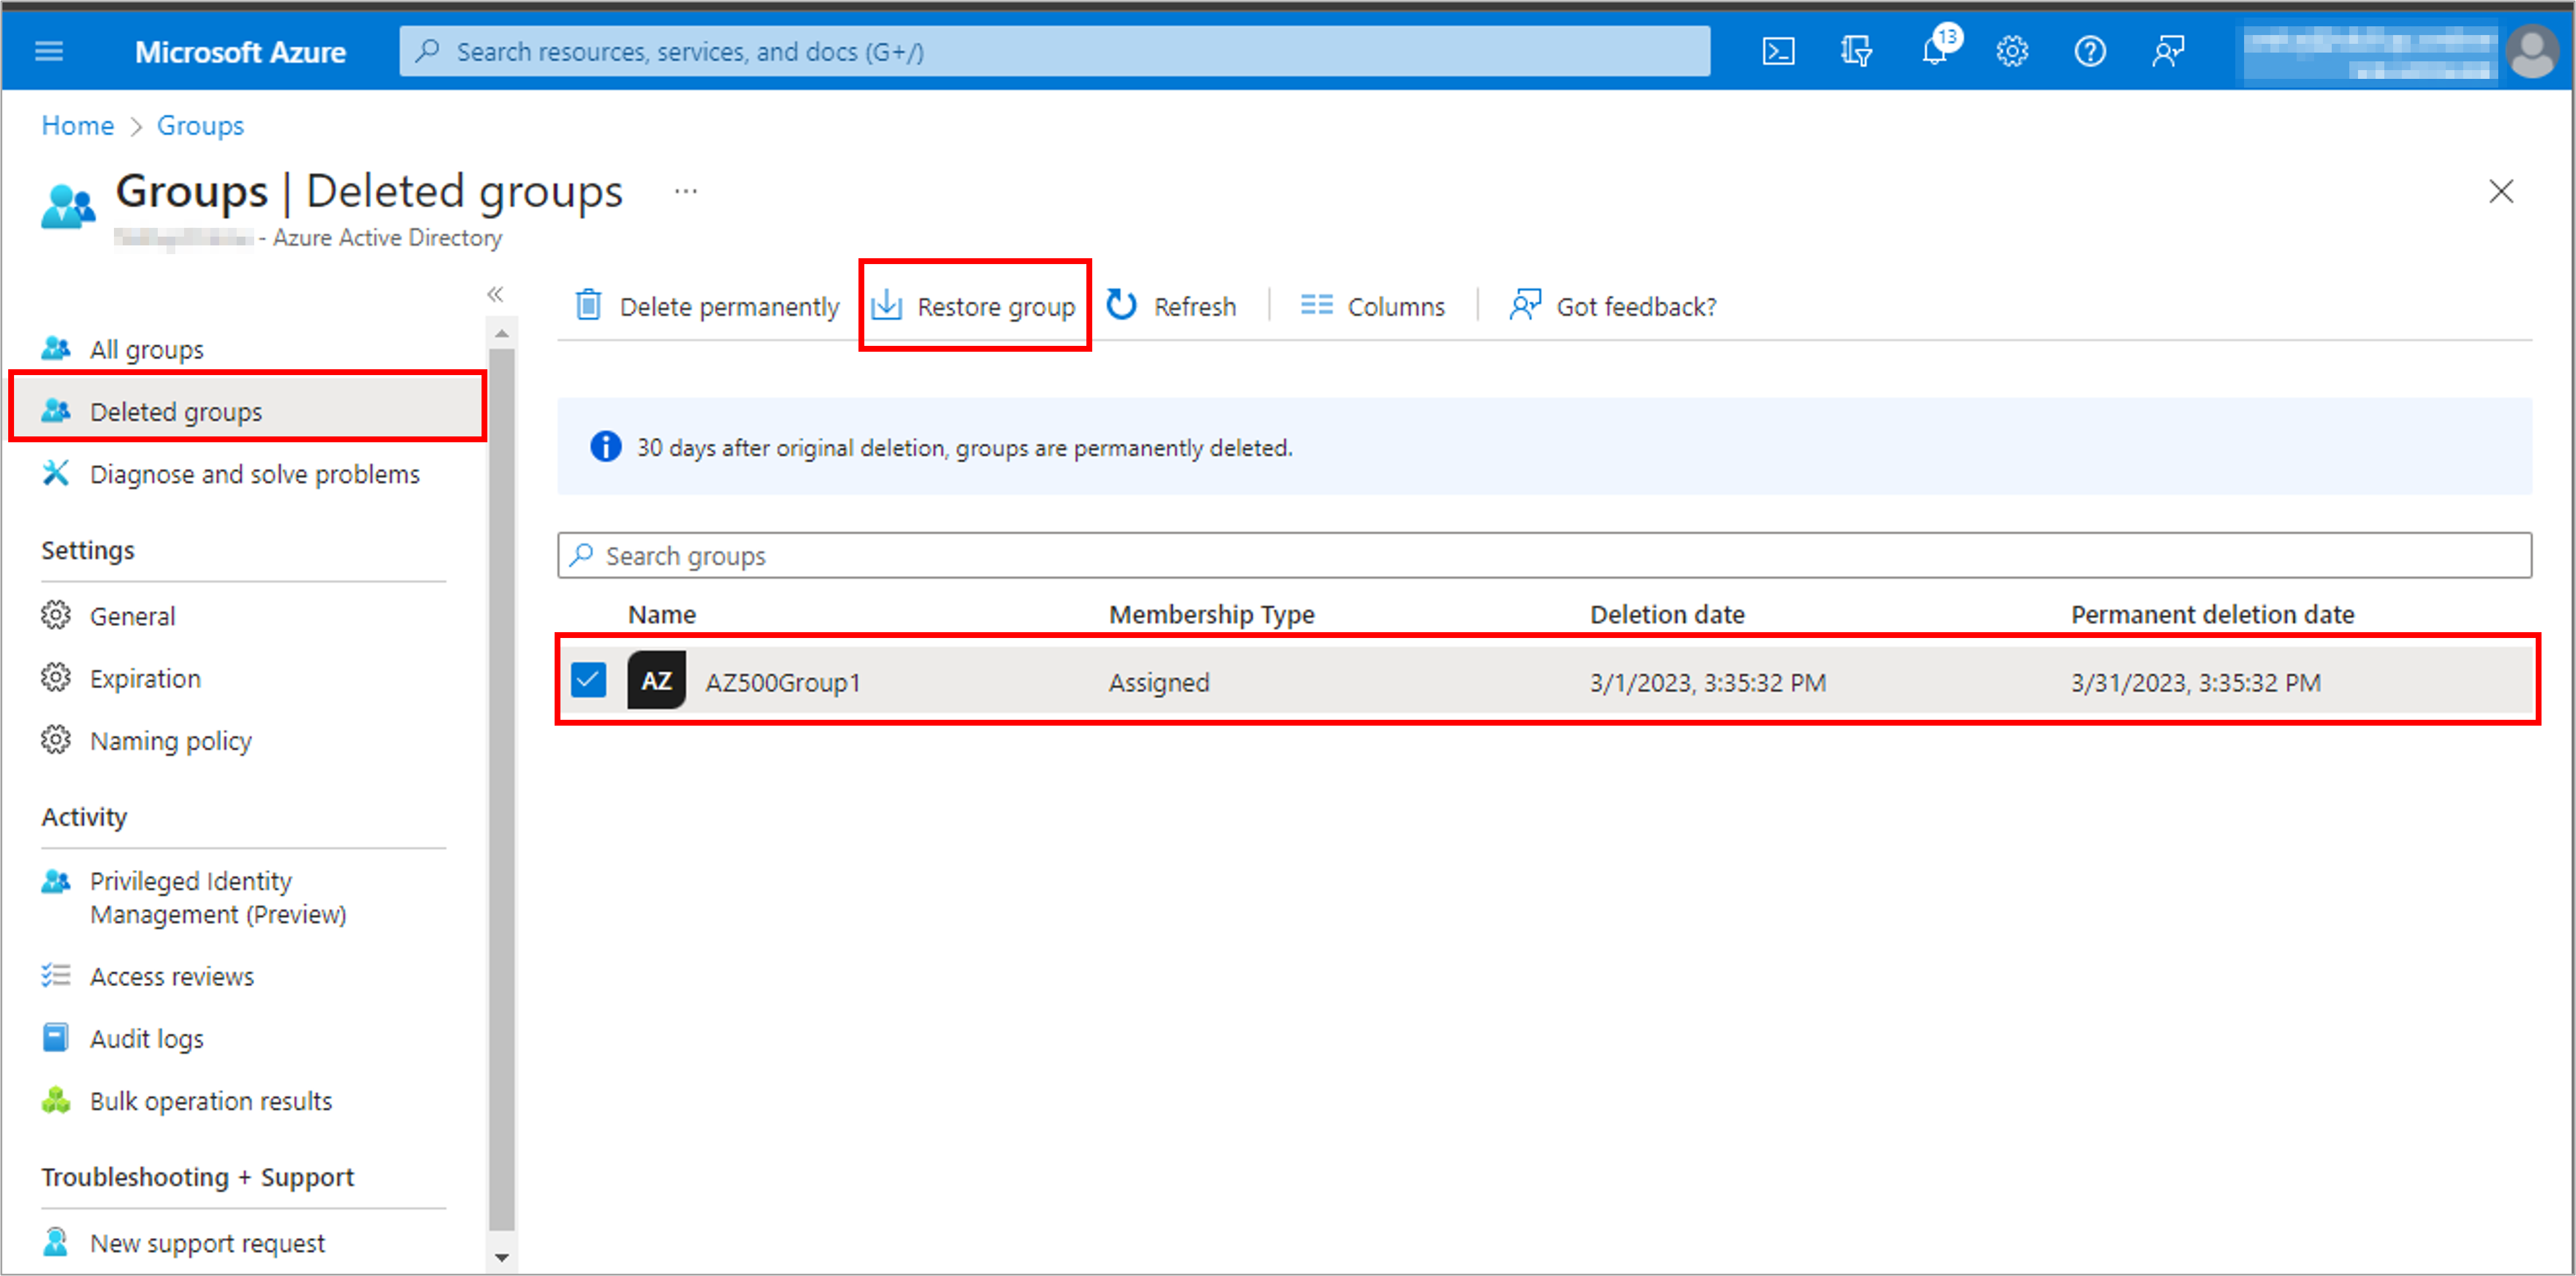
2. Review the list of groups that are available to restore.
3. Search for and select the group you want to restore.
4. Select Restore group.
5. You can view that the group has been restored.
On the Deleted groups blade, you can:
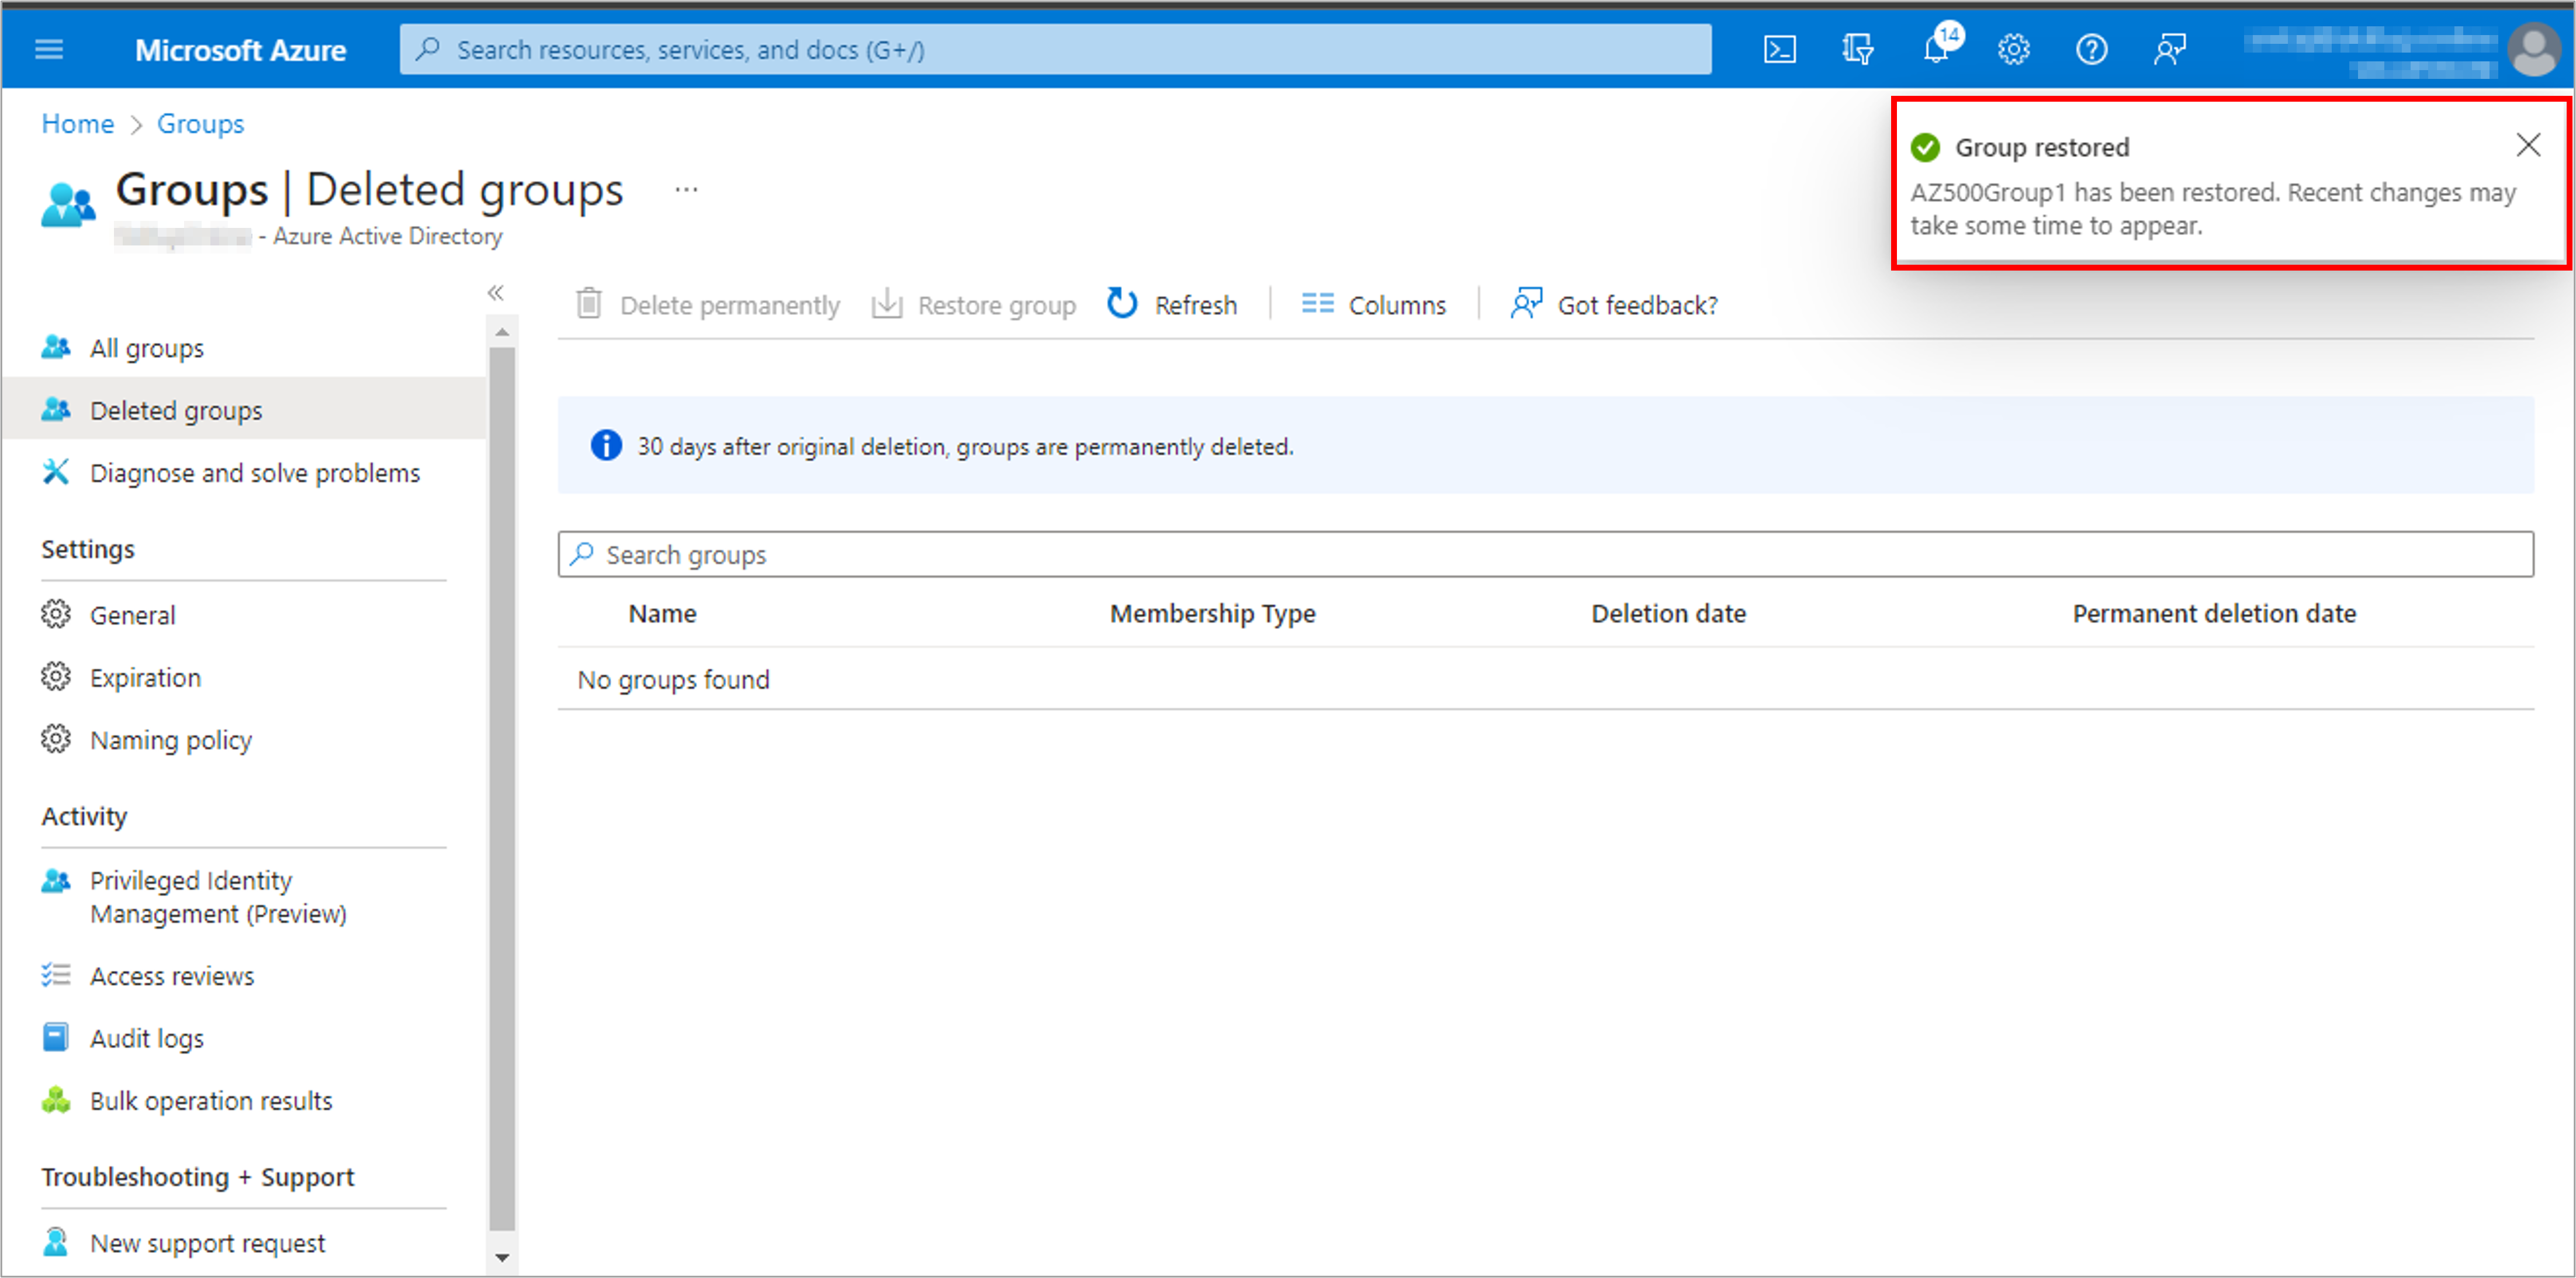
1. Restore the deleted group and its contents by selecting Restore group.
2. Permanently remove the deleted group by selecting Delete permanently. To permanently remove a group, you must be an administrator.
Optional task: Clean up resources
Note: Delete the active directory only if you have created it.
Do not delete the Active Directory which appears by default when you login to the Azure portal.
This is linked to your subscription.
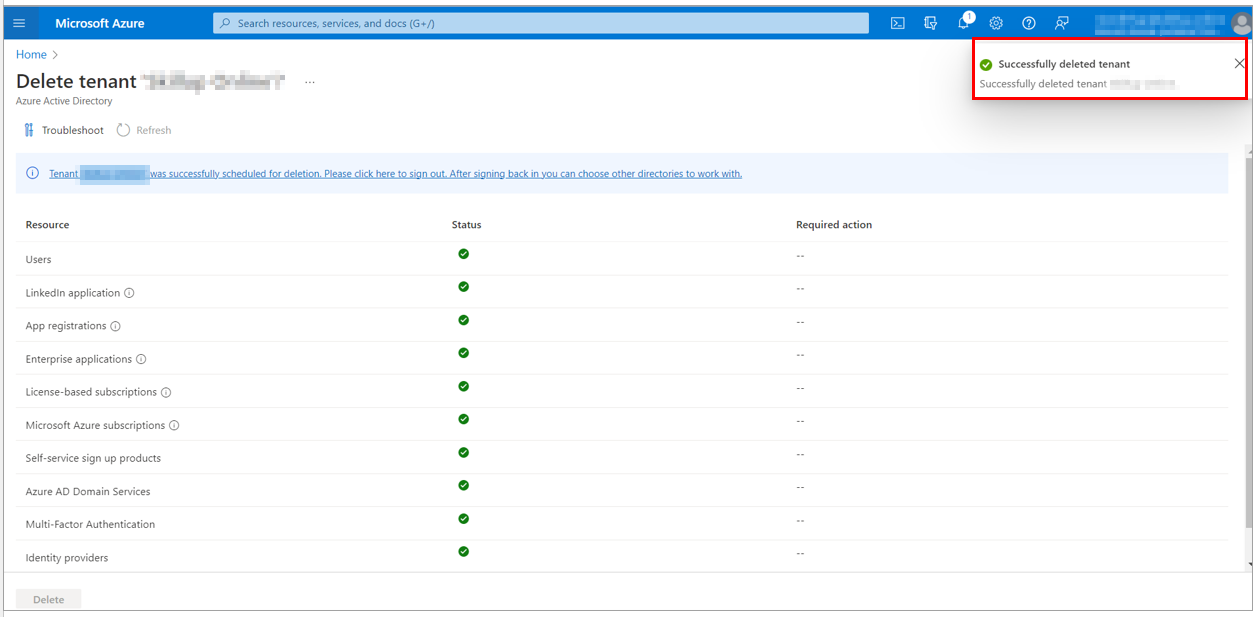
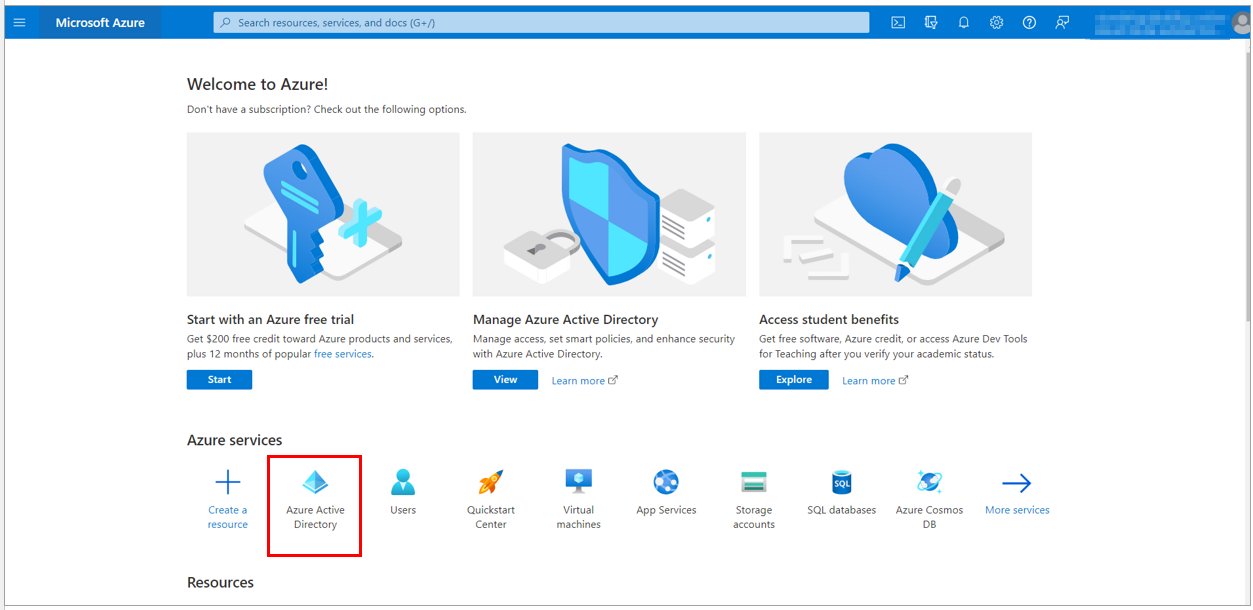
1. In the Azure portal, search for and select Azure Active Directory.
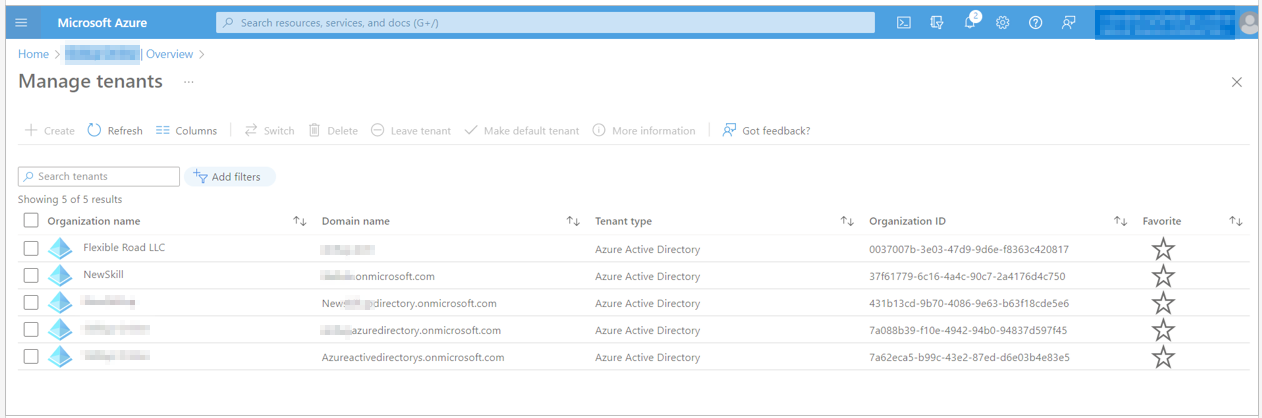
2. Select Manage tenants option.
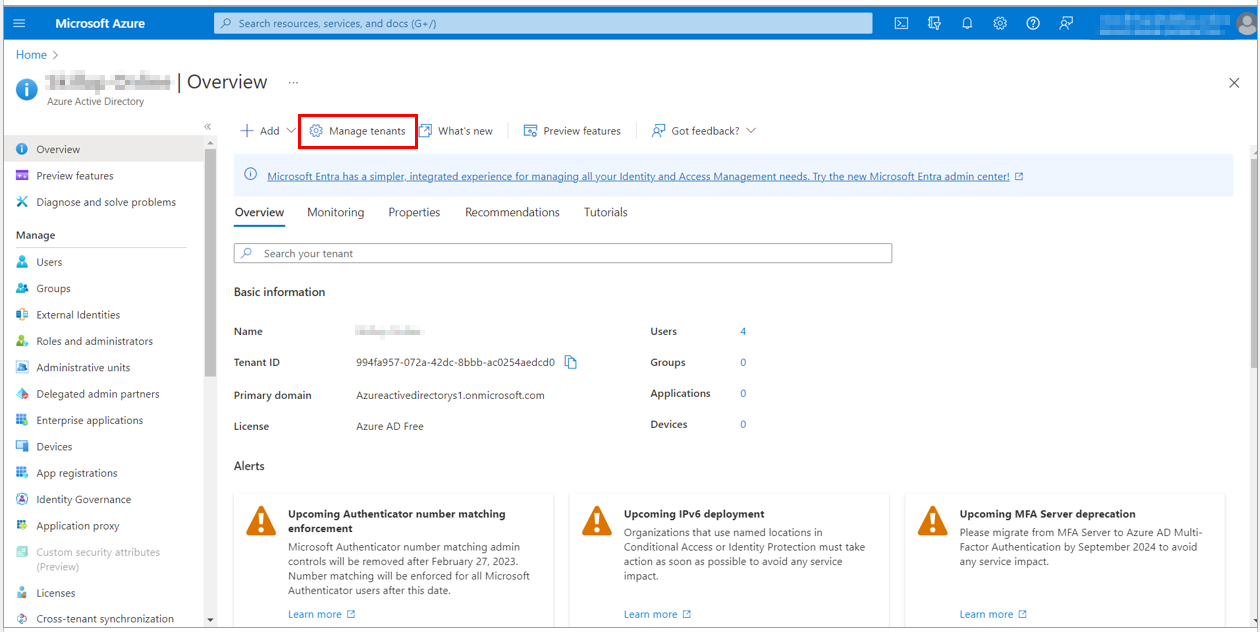
3. Select the Azure Active Directory you want to delete, and then select the Delete option.
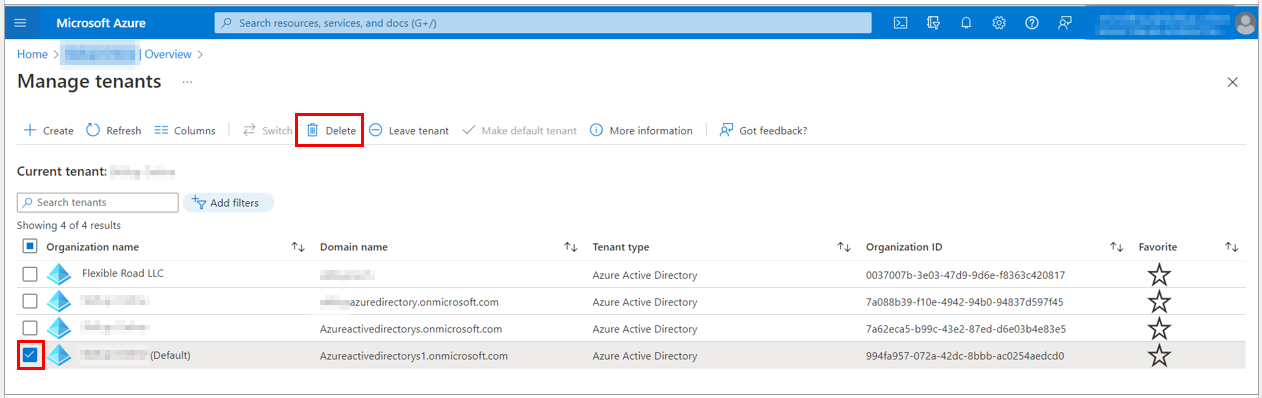
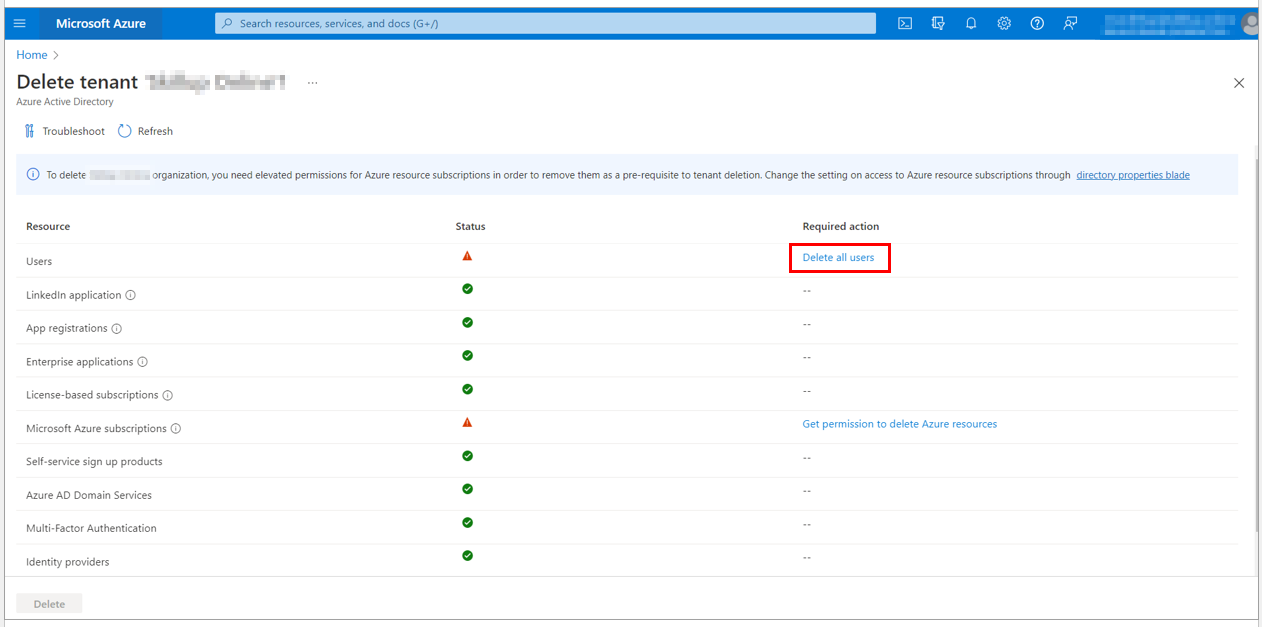
4. The Delete tenant screen loads up. If any other resources, such as Users or Applications, are present, you will need to delete them before deleting the Azure Active Directory.
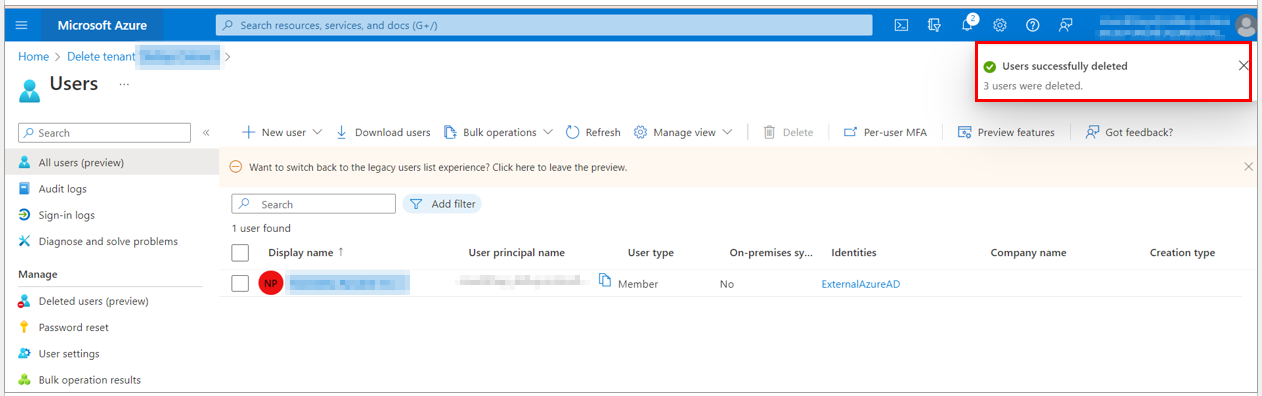
For instance, if you have created groups under your active directory, select the Delete all users link.
5. The Users blade page loads up. Here you can select the list of users you want to delete and select the Delete option.
Note: You should not select the user who has created the Azure Active Directory.

6. The selected users are successfully deleted, and the owner of the Azure Active Directory is displayed.
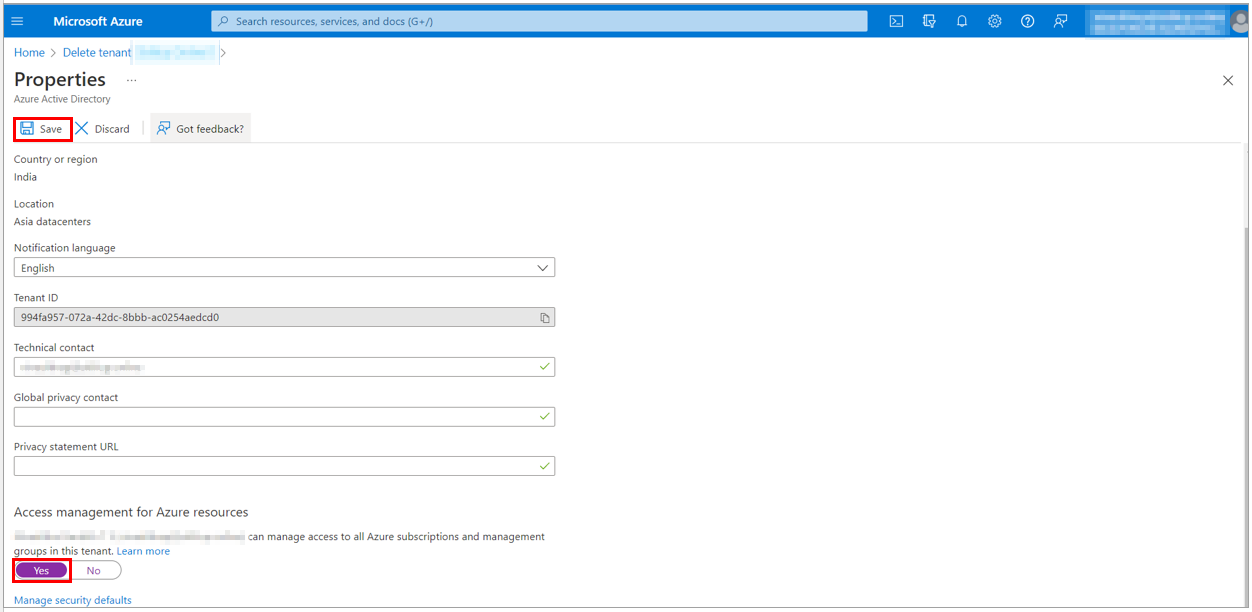
7. Navigate back to the Delete tenant screen. Here under Microsoft Azure Subscriptions, select Get Permission to delete Azure resources.
8. You will be directed to the Azure Active Directory Properties page.
9. You need to be a Global Administrator to delete an Azure Active Directory.
Check the properties under the Azure Active Directory to check the Access management for Azure resources. The toggle here should be set to Yes.
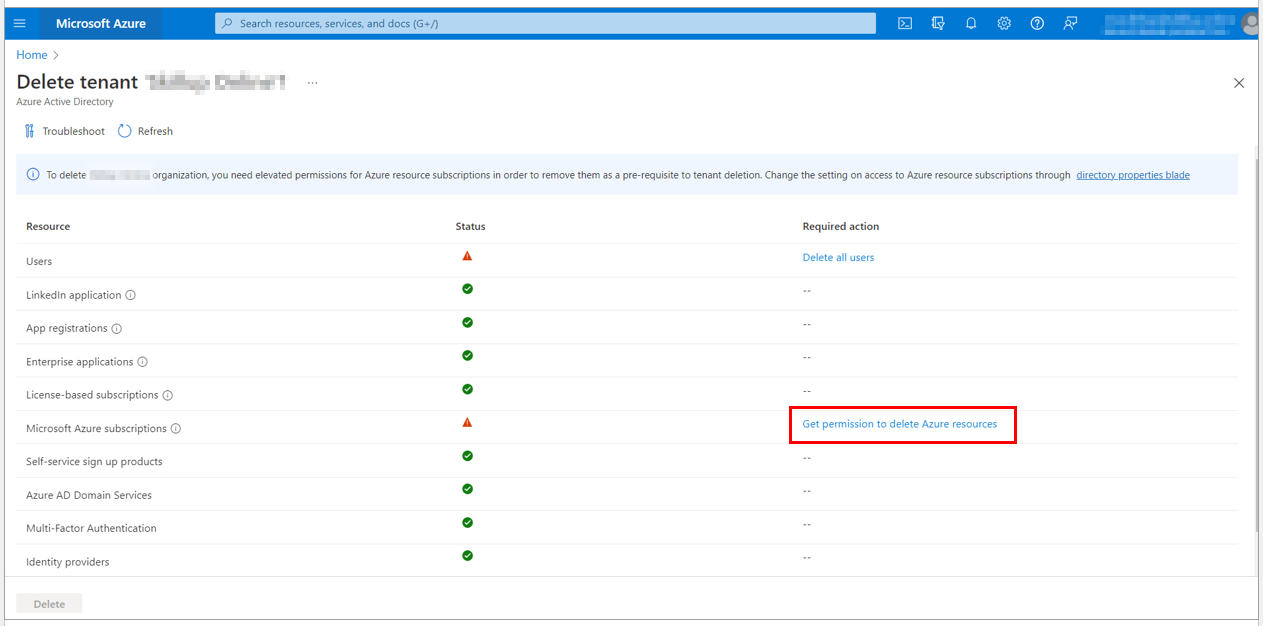
10. Once all the checks are passed in the Delete tenant page, delete the Azure Active Directory and the resources within it by selecting the Delete button.
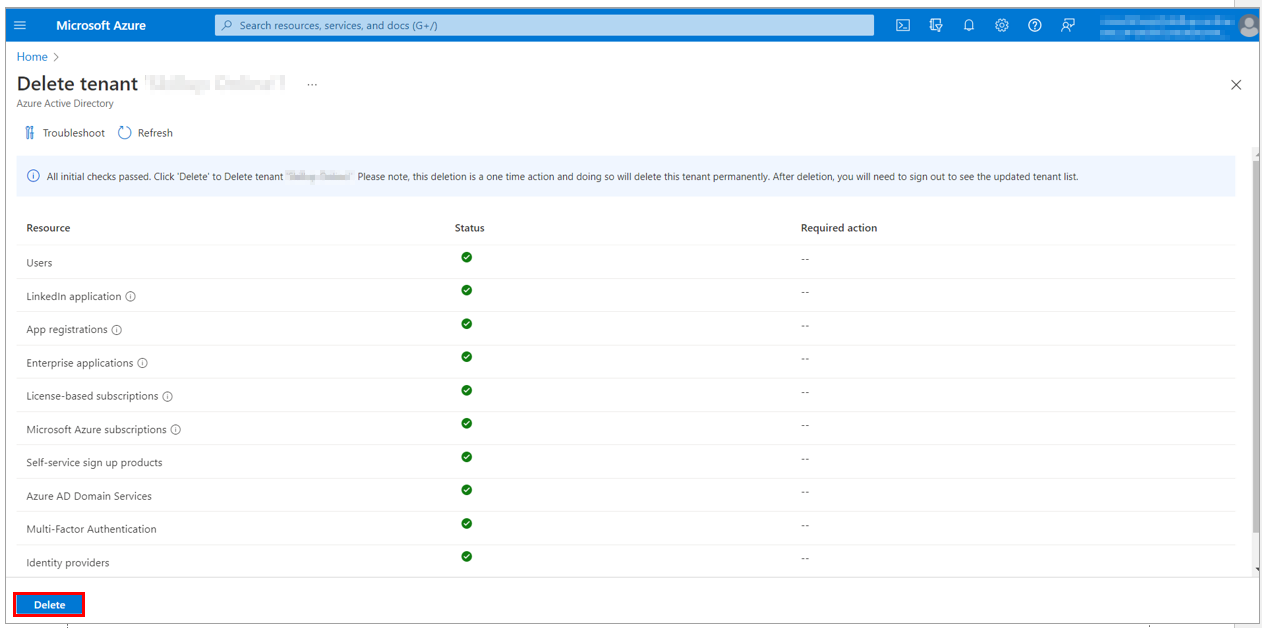
11. The tenant gets successfully deleted.